In the previous article you have read in details what is EPF now let us see how to add, edit and delete an EPF account using Deskera People.
Add EPF account
As an admin, you have an option to add a EPF account for your company by following the simple few steps.
- Under Settings module click on Company Settings a below screen will appear,

2. Under EPF Account section, click on the Add new button for creating a new EPF account .
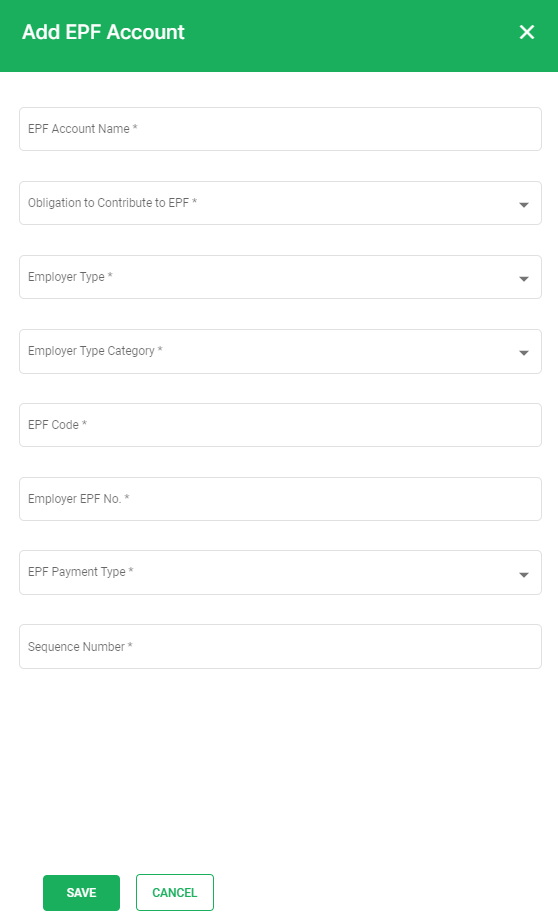
3. Below mentioned EPF form will pop up where you need to fill in all the required details,

- EPF Account Name - Fill in Company EPF account Name
- Obligation to Contribute - Select the option from drop down menu (Employer, Employee Contract of Service or Apprenticeship, Wages)
- Employer Type - Select employer type from drop down menu( Public Sector Employer,Private Sector Employer, ProfessionalBodies/Associations/Co-Operatives And Others (Non-SSM)Employe)
- Employer Type Category - Select employer type category as per Employer type is selected.
- EPF code - Fill in Employer EPF code
- EPF no - Fill in Employer EPF number
- Sequence No
Once all this information is filled and verified click on the Save button and your new EPF account is added in the system.
Edit and delete EPF account
You can edit and delete the EPF account from the system, by pointing the cursor on the card where you can see the edit and delete options.

Edit EPF account
After creating a new EPF account, if you want to make any changes you can do so by clicking on the edit button. An editable EPF account form window will pop up where you can make the changes in the required fields.
Later, click on the Save button, and the changes will be reflected in the EPF account.
Delete EPF account
If you wish to remove the EPF account from the system, you can do so by clicking on the Delete option.
Every month the employer needs to submit their employees EPF contribution details to the government.
Congratulations! You have successfully learned how to add, edit, and delete EPF account Using Deskera People.

