

When designing your document template, you need to ensure that you are using the default system fields available in Deskera Books in order for our system to populate the data accordingly.
So, what if you need to apply additional information in your invoice/bill document and you are clueless on how to do that?
In this support article, we will guide you on how to apply custom fields in the document designer module.
Follow the steps as mentioned below:
- Go to the Settings on the sidebar menu.
- Click on the Custom Fields.
- Follow the steps here to create a custom field.

4. After you have successfully created the custom fields, you need to note down the sequence number of the respective fields.
5. Next, go to Document Template.

6. Click on the respective template that you wish to apply the custom fields.
7. Click on the contextual menu and select Download Template button.
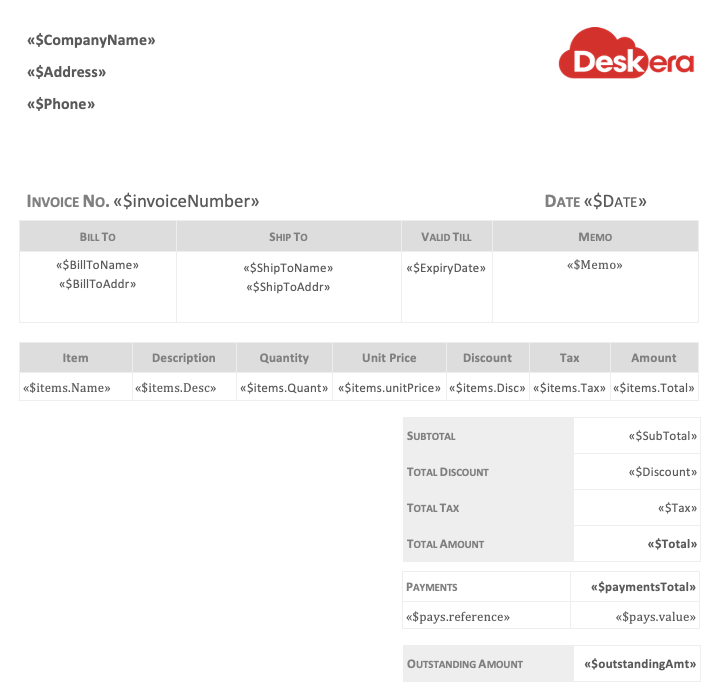
8. The image shown above is the default invoice template in Deskera Books.
9. You will have to follow the steps stated below to merge custom field in document template. Copy paste the custom fields below in the document template.
- The custom field on document level: doc_D-00001
- The custom field for line item level: items.customFields['D-0000002']
*Please note that the sequence number as shown above will have to follow the sequence as stated in the custom field. (Refer to the image at point 3)
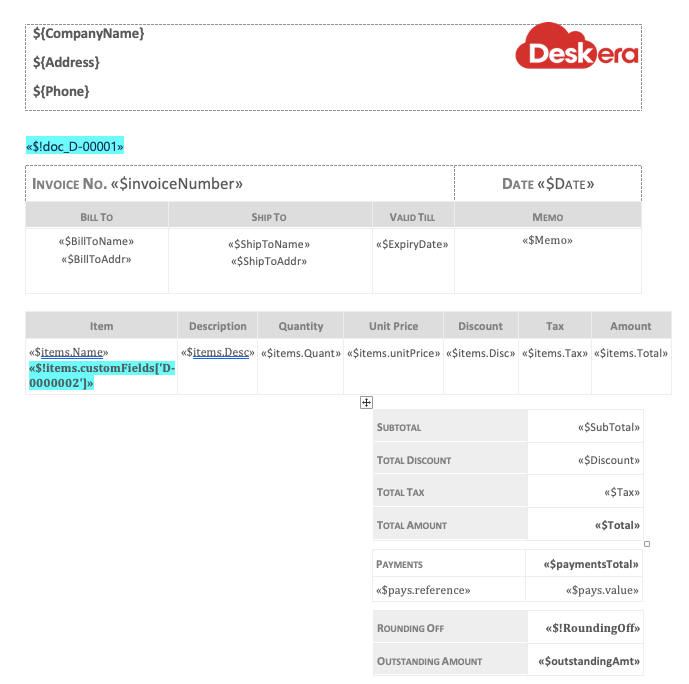
10. You can enter the document level's custom field anywhere outside the tables as shown above. The line item custom fields can only be placed on the item table.
If you place the line item custom fields outside the table, the system won't be able to capture the data.
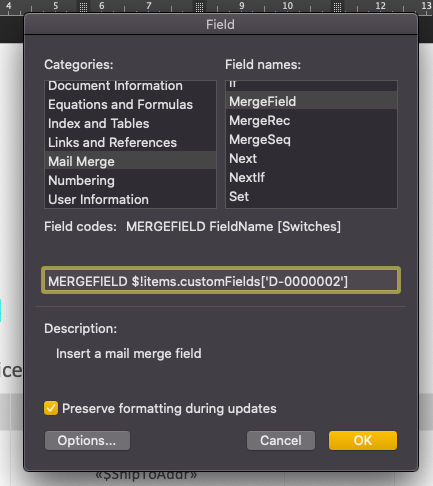
11. A dialog box will appear. Under categories, select Mail Merge. Under the Field names, select Merge Field.
12. Next, in the MERGEFIELD box, please indicate the custom fields as stated in point 9, with a $! sign before the field, as shown above.
13. Click on the Ok button.
14. Save the document template, upload it on the respective document designer and set it as default template.
15. After you have applied the custom fields for the respective products during invoice and bill creation, click on the print document button.
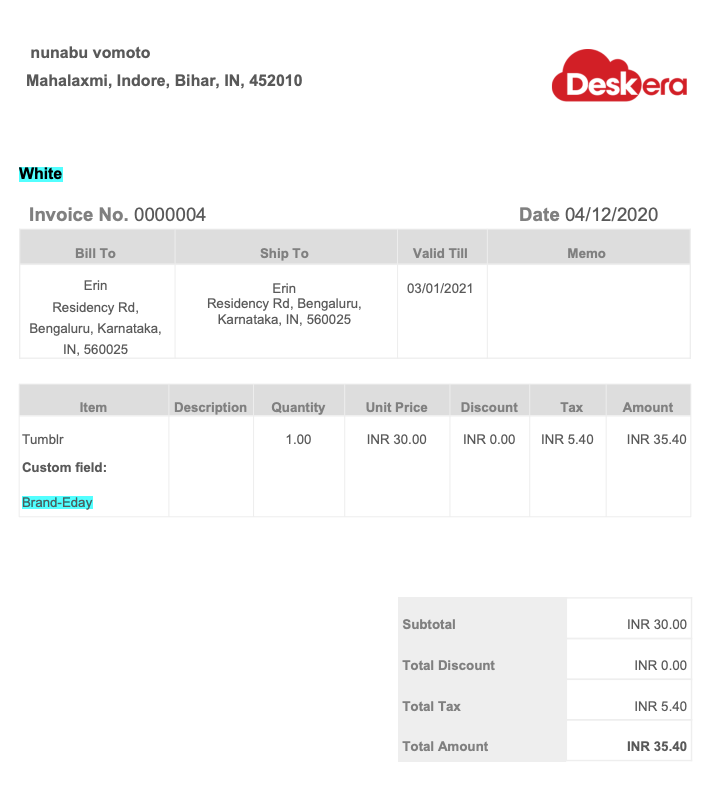
16. The custom fields will be populated in your invoice or bill document as shown above.
Congratulations! You have successfully applied the custom fields in your invoice and bill document in Deskera Books.