If you have an eCommerce store on Shopify, you can now integrate your Shopify store to Deskera Books.
In this article, we'll guide you on how to connect to your Shopify account via Deskera Books Marketplace App.
Read more below.
Where do I connect to my Shopify account?
- Login to your Deskera account.
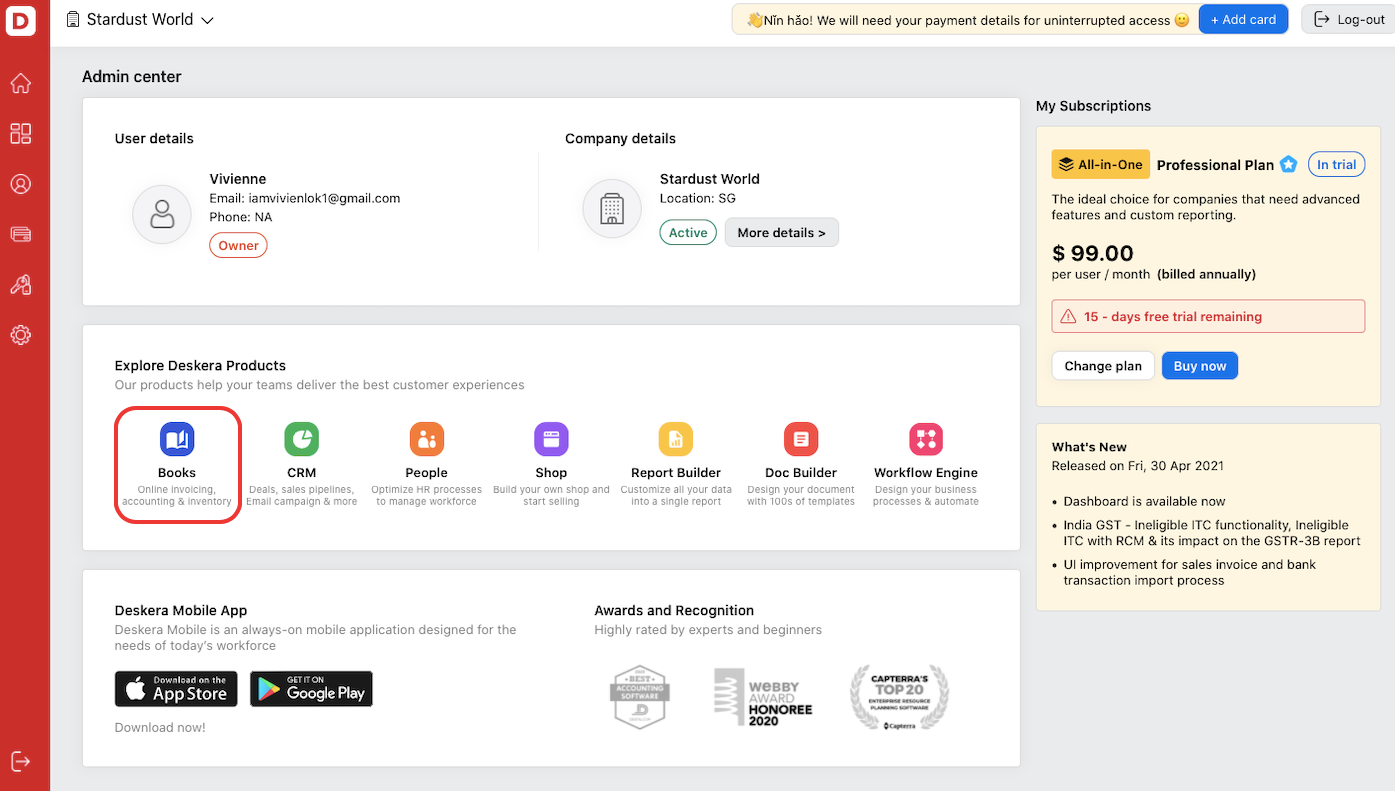
2. Once you have logged in to your account, click on Books on Deskera main console.
3. This action will direct you to Deskera Books' main dashboard.
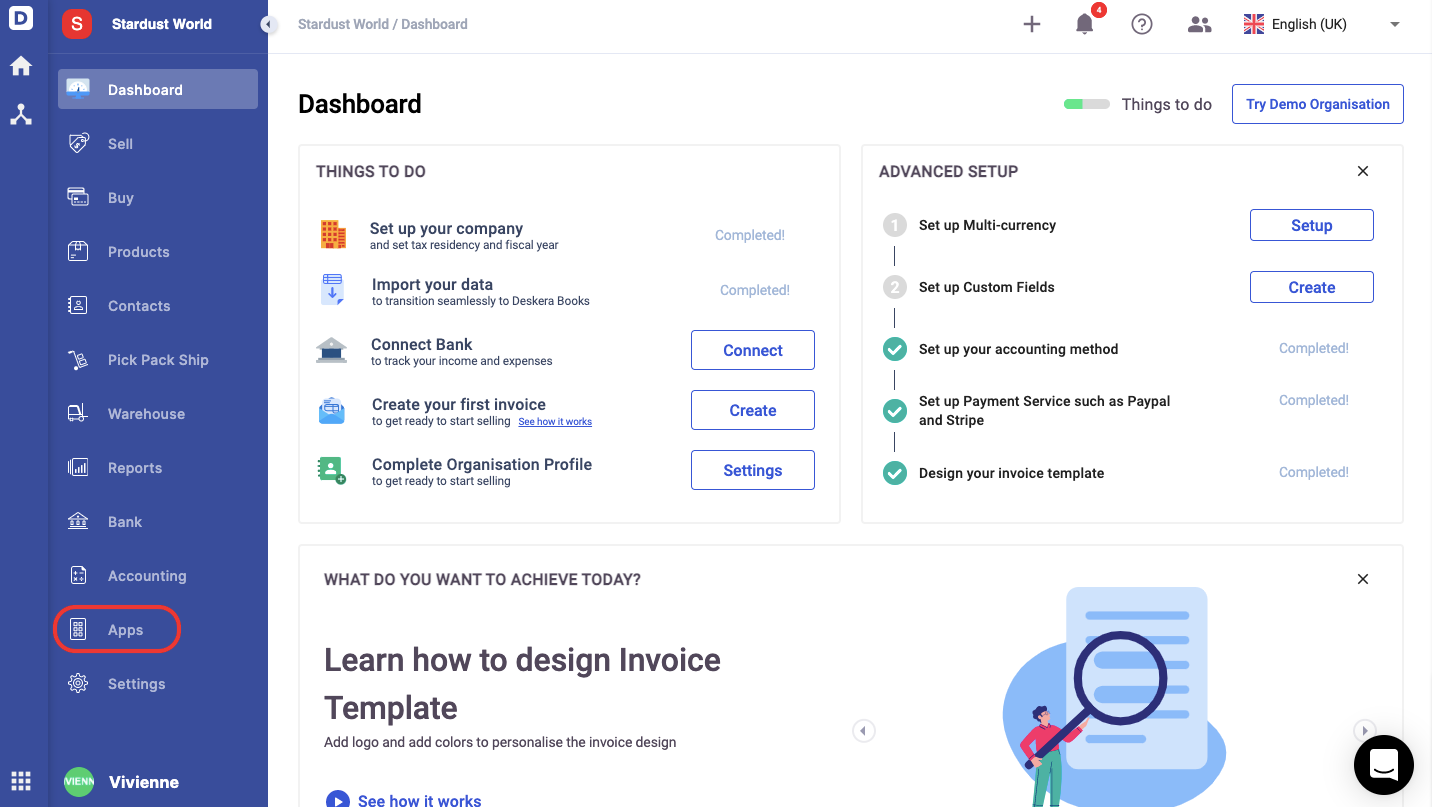
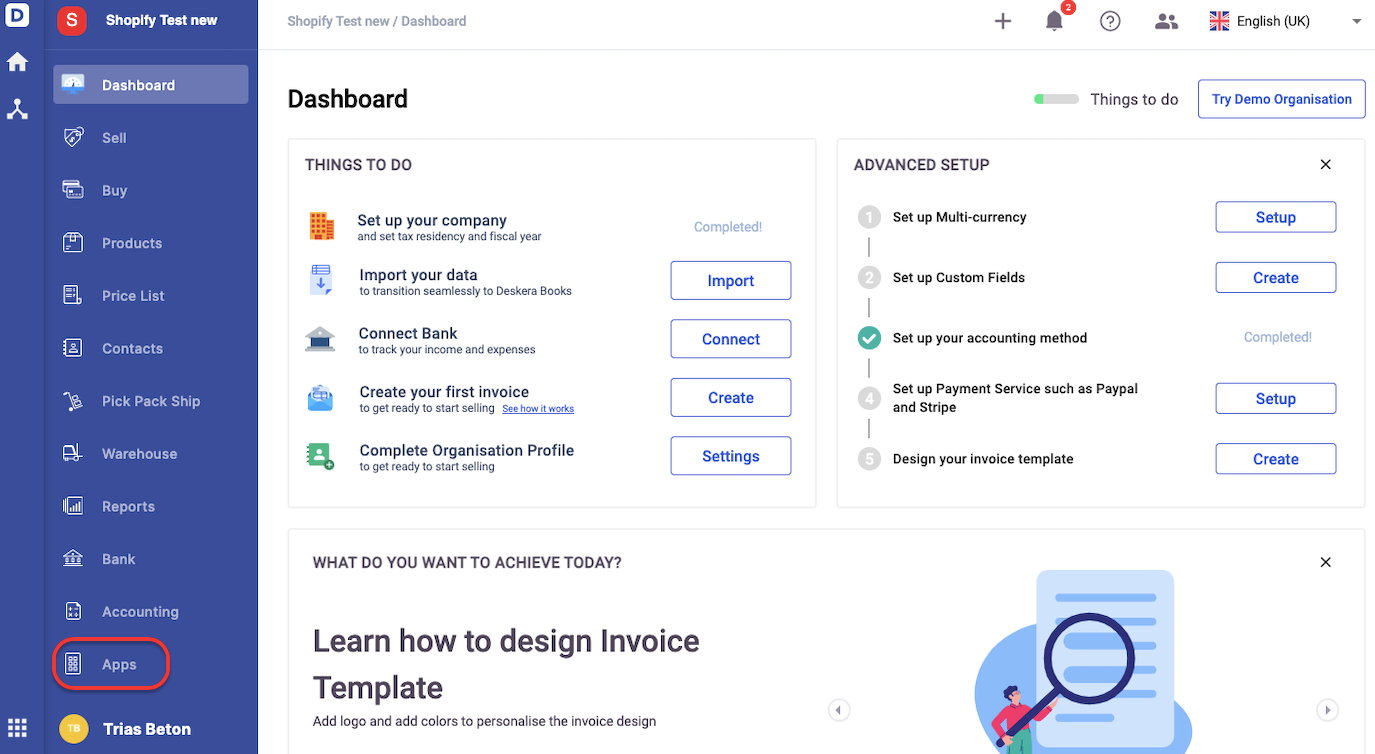
4. On Deskera Books' main dashboard, click on Apps via the sidebar menu.
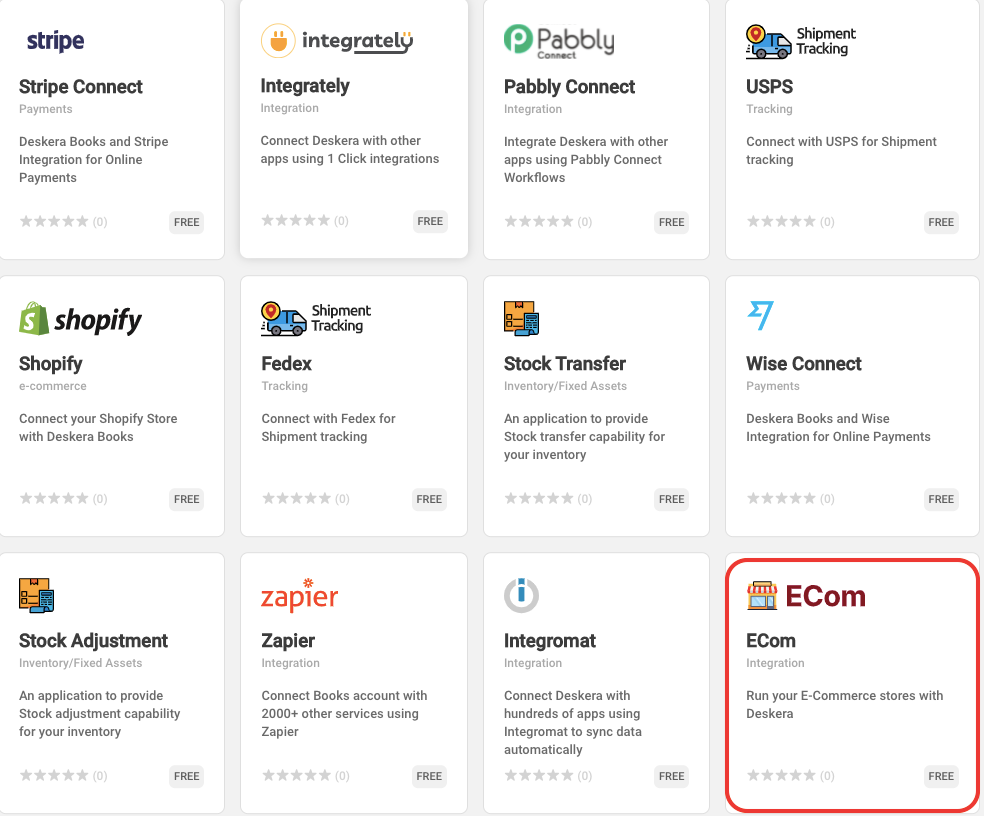
5. Click on ECom app.
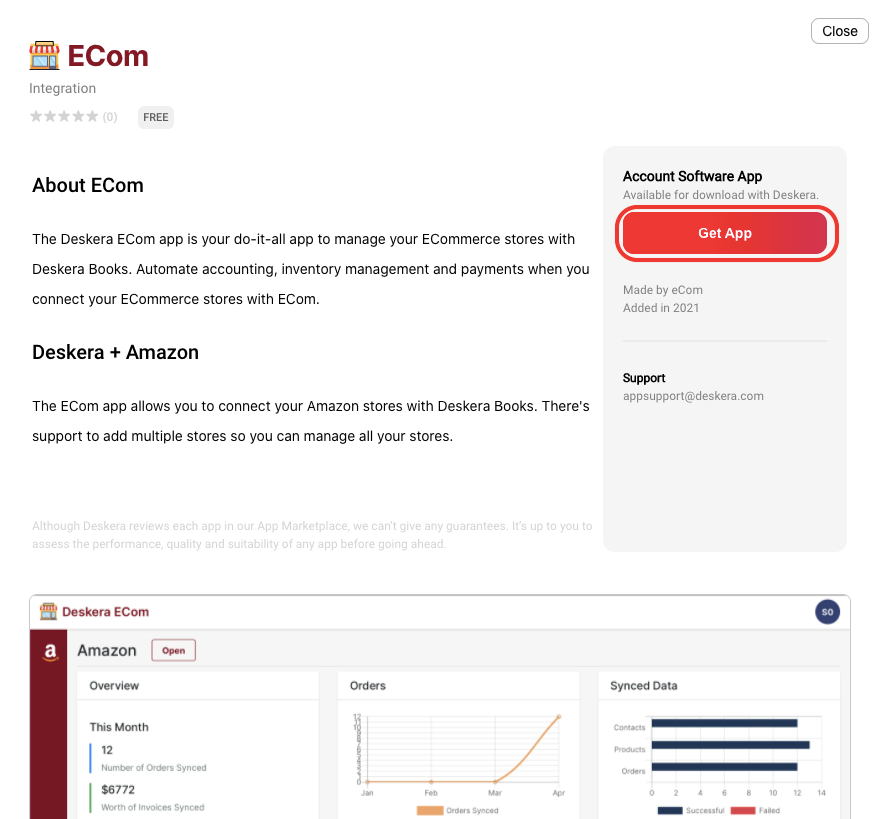
6. A pop-up will appear, and click on the Get App button.
How do I connect to my Shopify account?
Once you have selected the Get App button, the system will direct you to page below. Click on Shopify via the sidebar panel.
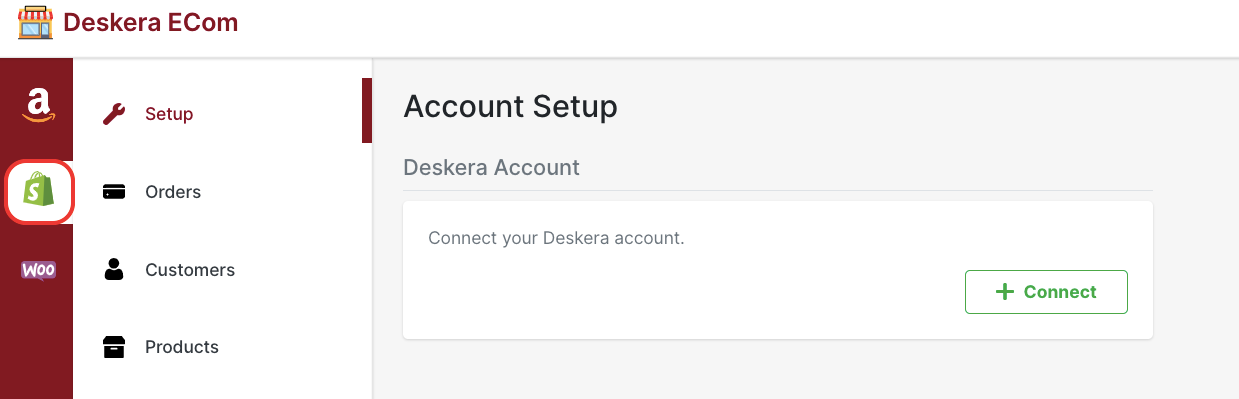
Follow the steps below:
- Connect to your Deskera Books' account by clicking on the Connect button.
- Enter your account's credential and select your organization from the drop-down menu.
- Click on the Save button.
- Next, configure your Shopify account here:
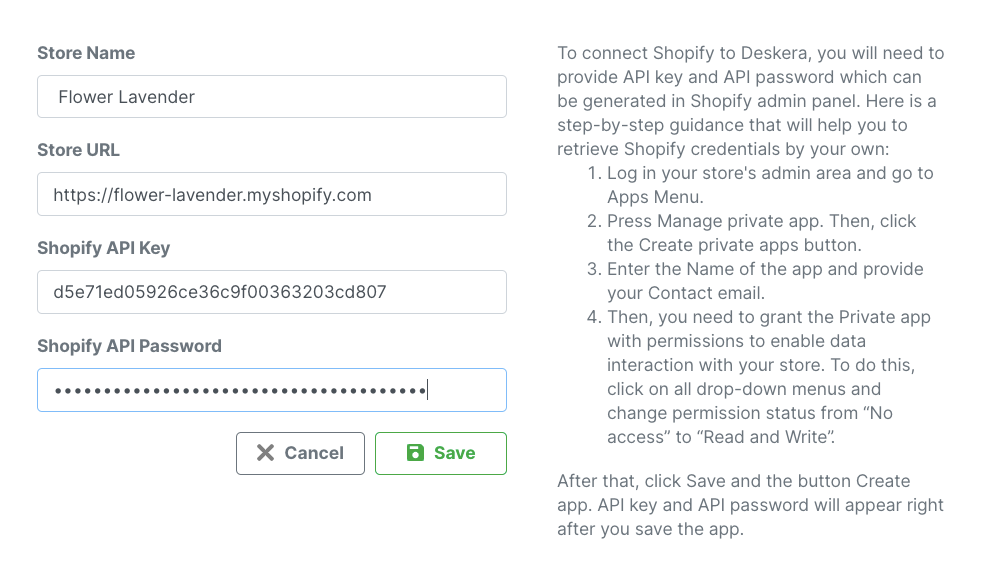
- Store Name - Enter your Shopify store name
- Store URL - Enter your Shopify store URL
- API - Enter your store's API key
- API Password - Enter your store's API password
5. Click on the Submit button.
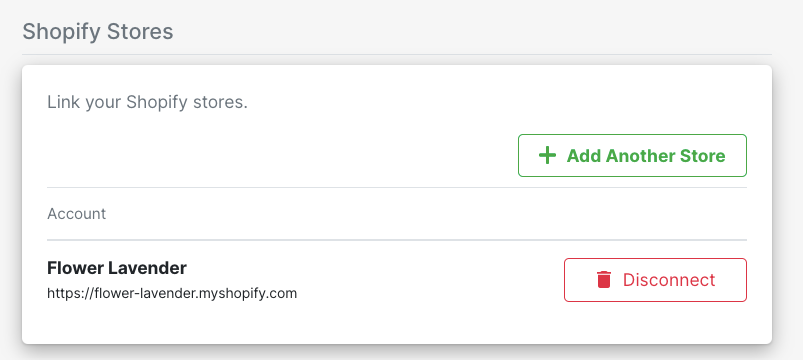
6. You can view your Shopify account connected successfully to Deskera Books. Click on the disconnect button to discontinue the connection if you wish to.
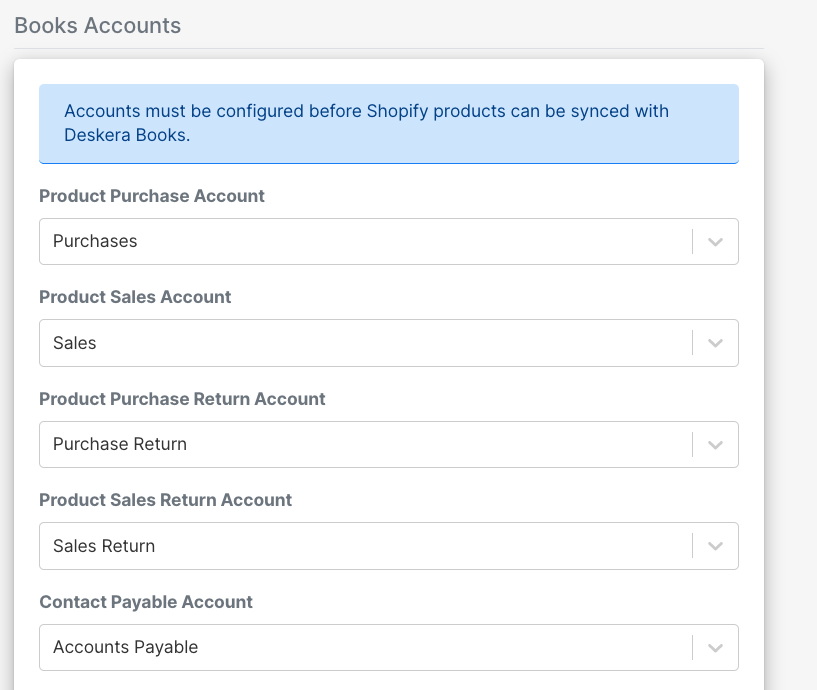
7. Next, choose from the right accounts for every fields in the table above so that your data can sync to Deskera Books.
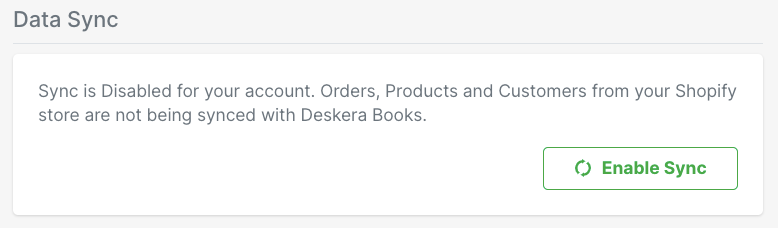
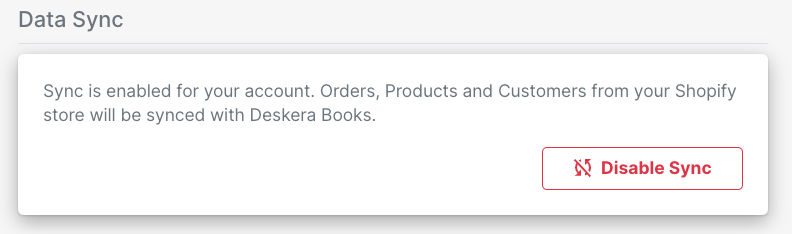
8. After you have updated the accounts, click on the enable sync button for the sync to flow. Click on Disable sync to cancel the synchronization.
Where can I access my API key, API password and shared secret?
- Login to your Shopify account
- Click on the Apps via the sidebar menu

3. On the Apps page, click on the Manage Private Apps link at the bottom of the page.

4. Next, click on the Create Private App button.
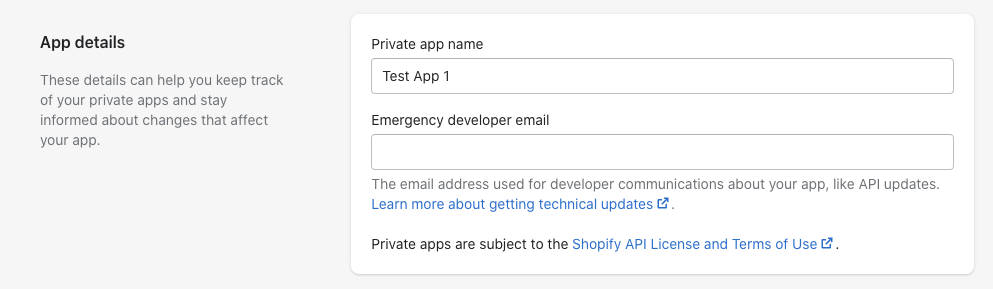
5. On the first card, key in the App details such as:
- Private App Name
- Emergency developer email
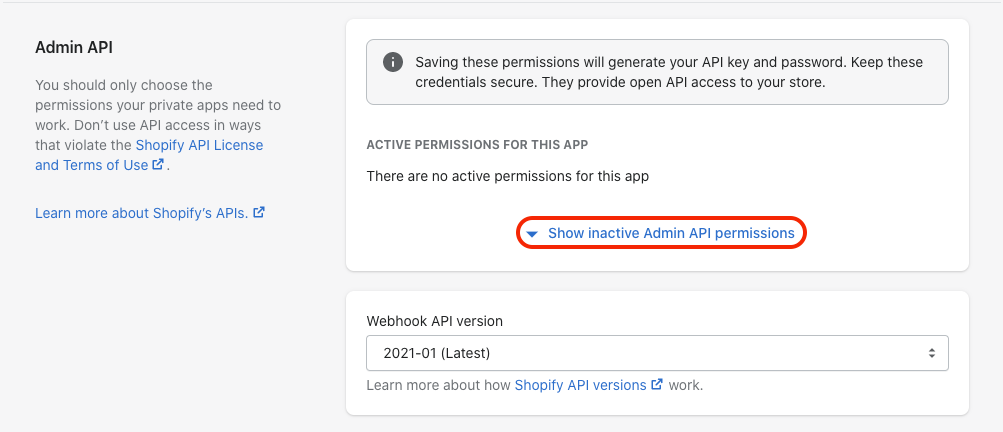
6. On the second card, click on the drop-down of the show inactive admin API Permissions.
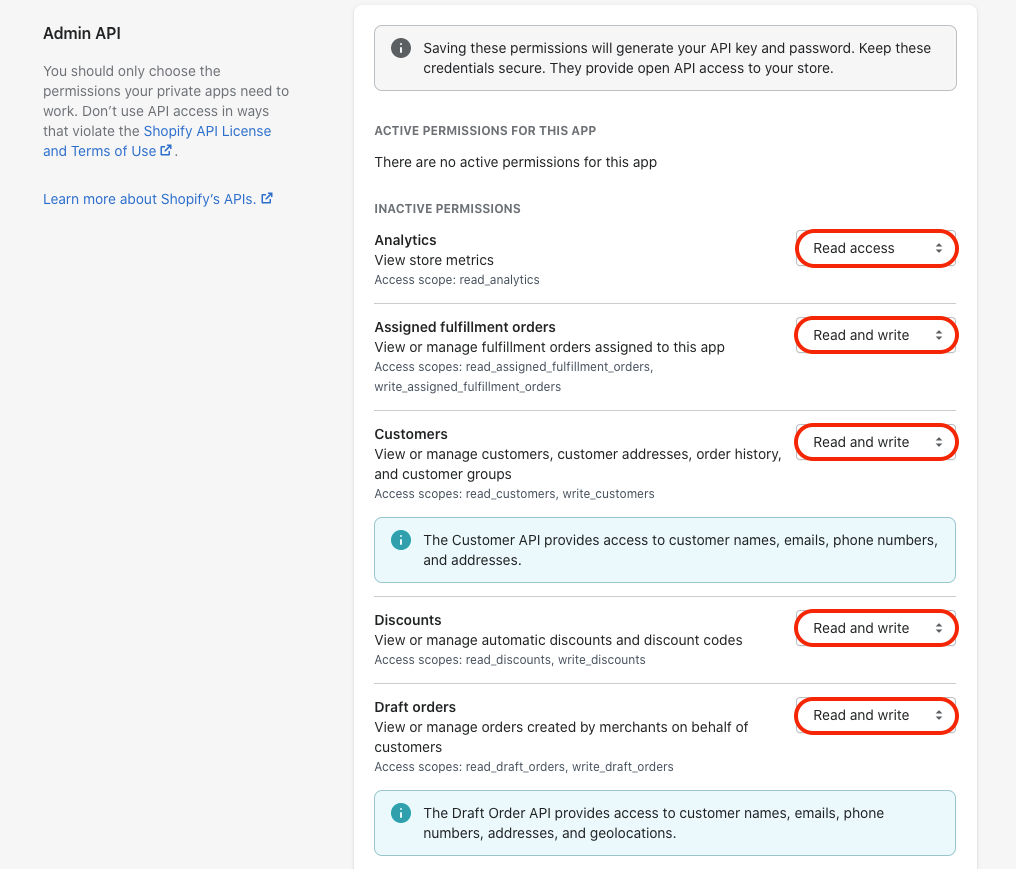
7. Change all the app's status from "No Apps" to "Read and Write" status.
8. After that, click Save.
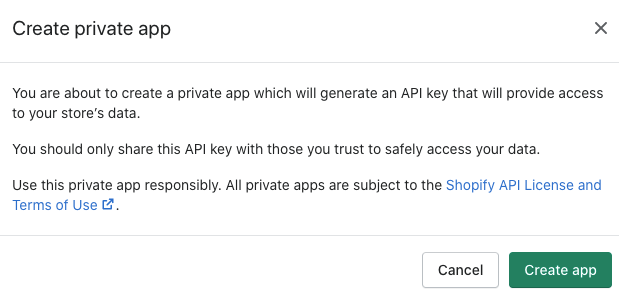
9. Next, click on the Create App button.
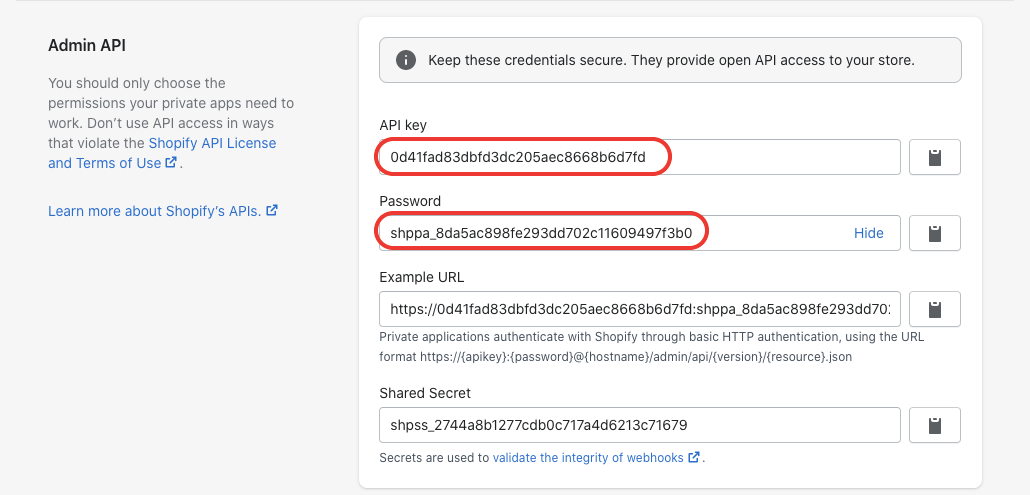
10. You should be able to view the API key and API password after saving the app.
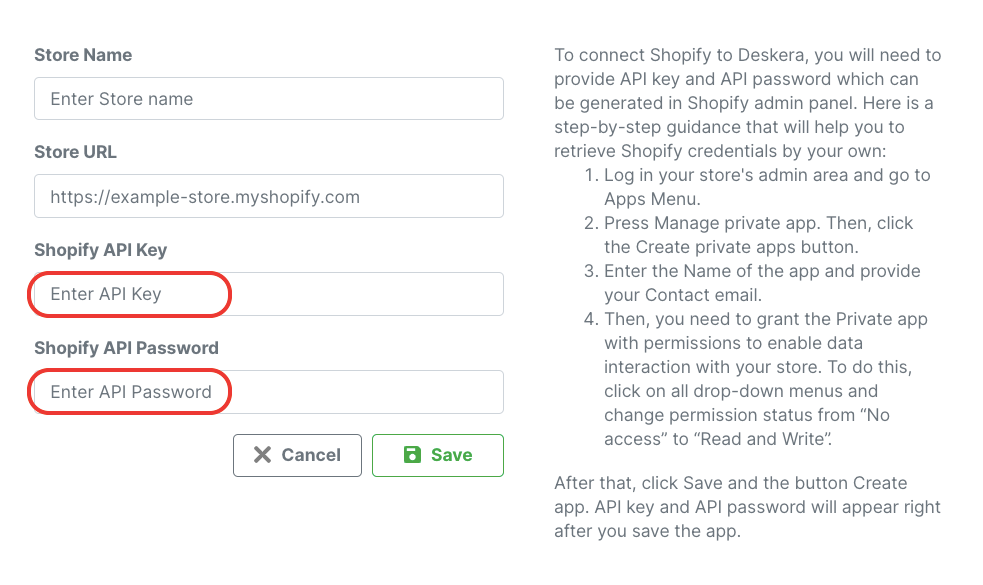
11. Insert these API keys found on image (a) to the fields on image (b) when configuring your Shopify account in Deskera Books.
12. Click on the Submit button.
Where can I view my contacts sync from Shopify to Deskera Books?
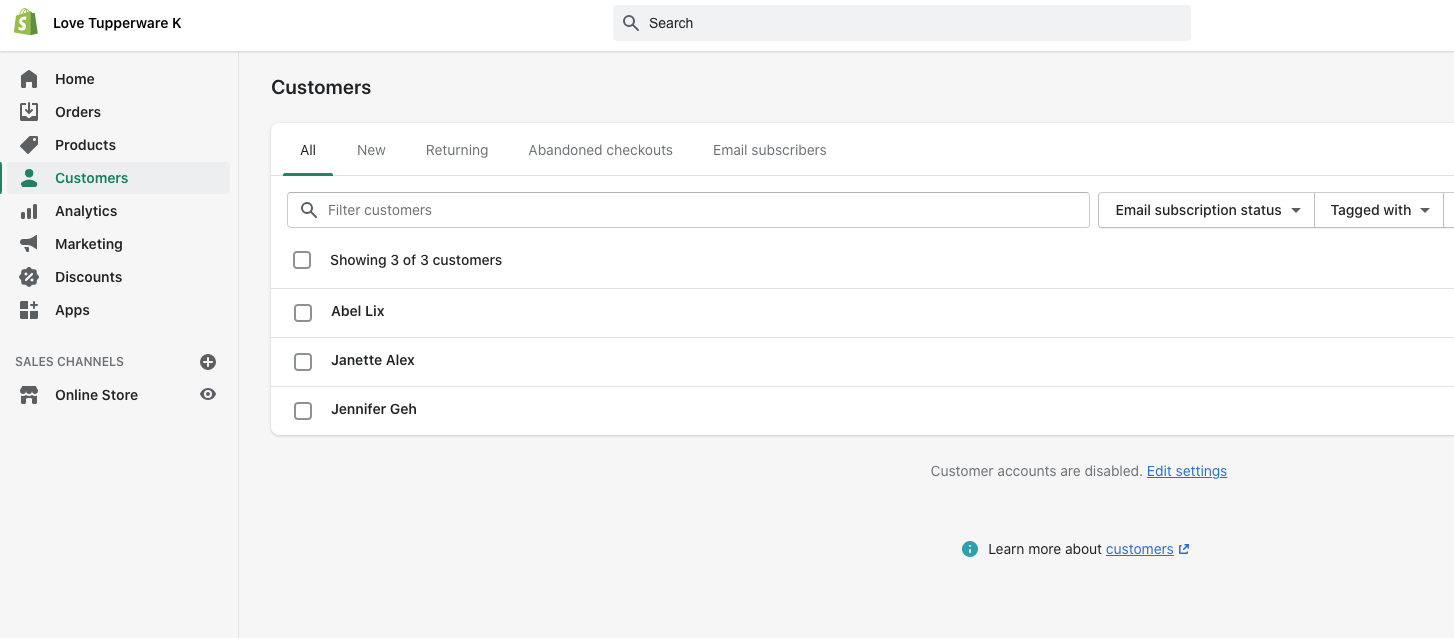
- Once you have created and saved your contact in Shopify, you can view your contacts in Shopify Connect page in Deskera Books.
- Click on the Contact tab via the sidebar menu. On this page, you can view all the contacts sync from your Shopify account.
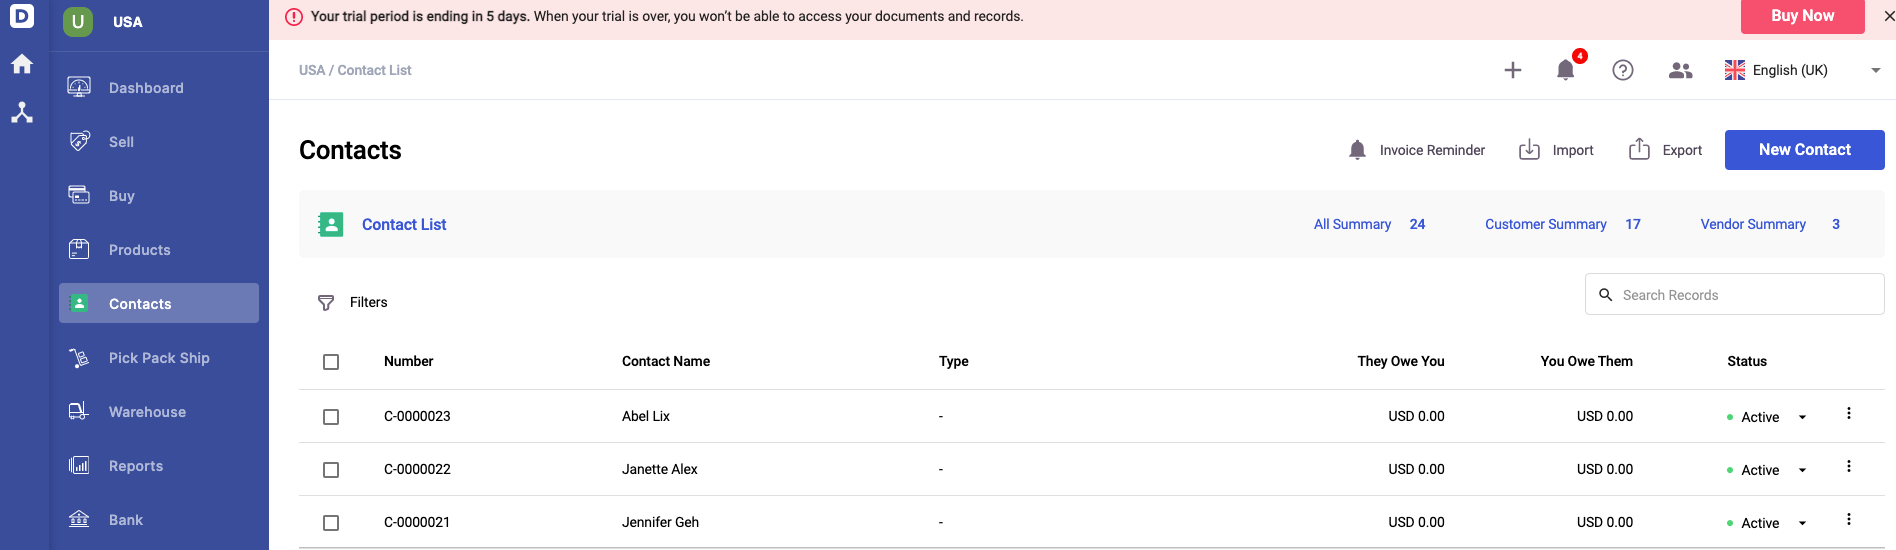
3. In Deskera Books, you can view your Customers created in your Shopify account as well.
Where can I view my products sync from Shopify to Deskera Books?
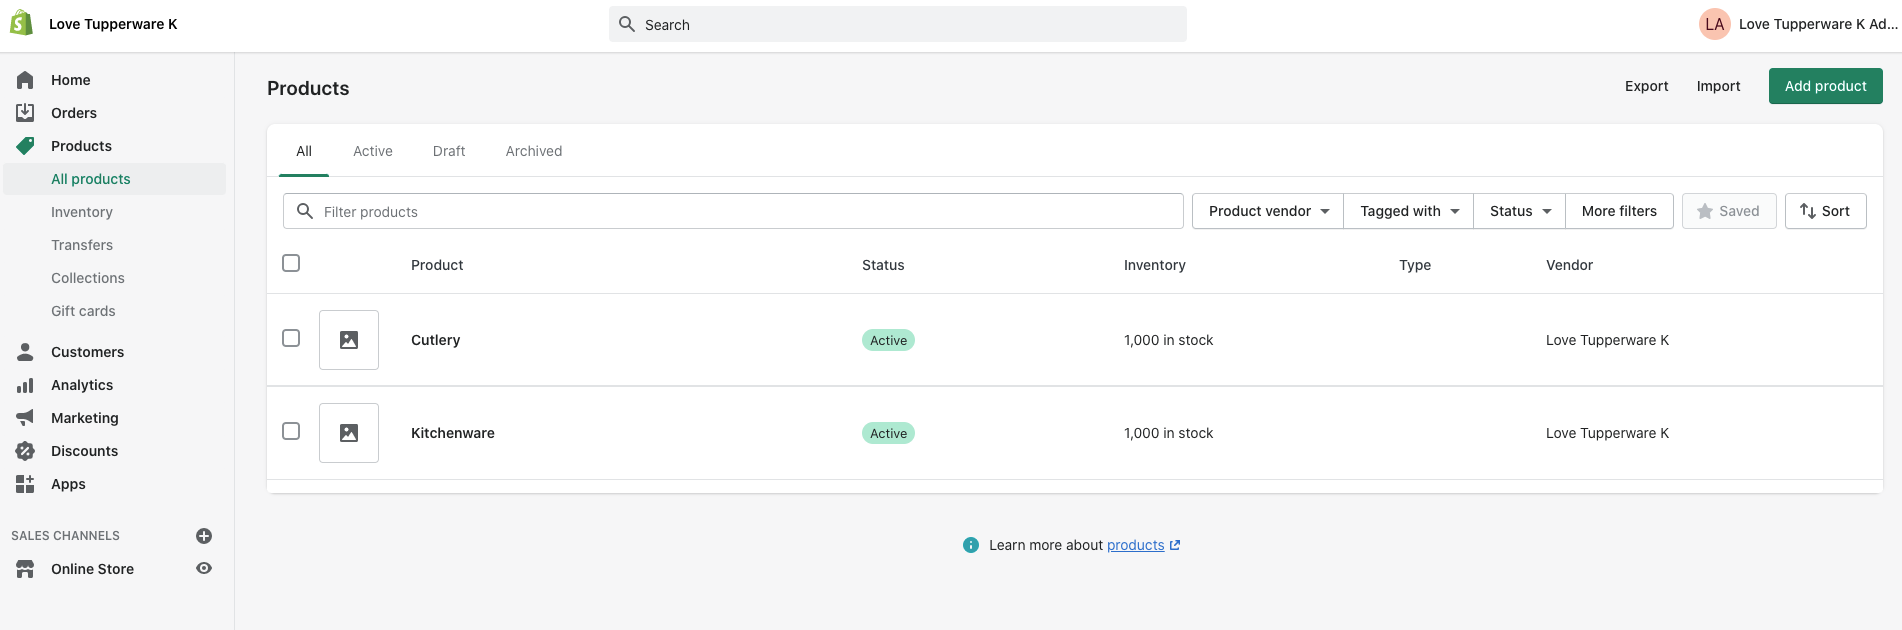
- Once you have created your products in Shopify, the products will be reflected in Deskera Books.
- Click on the Products tab via the sidebar menu in Shopify Connect. On this page, you can view all the products sync from your Shopify account.
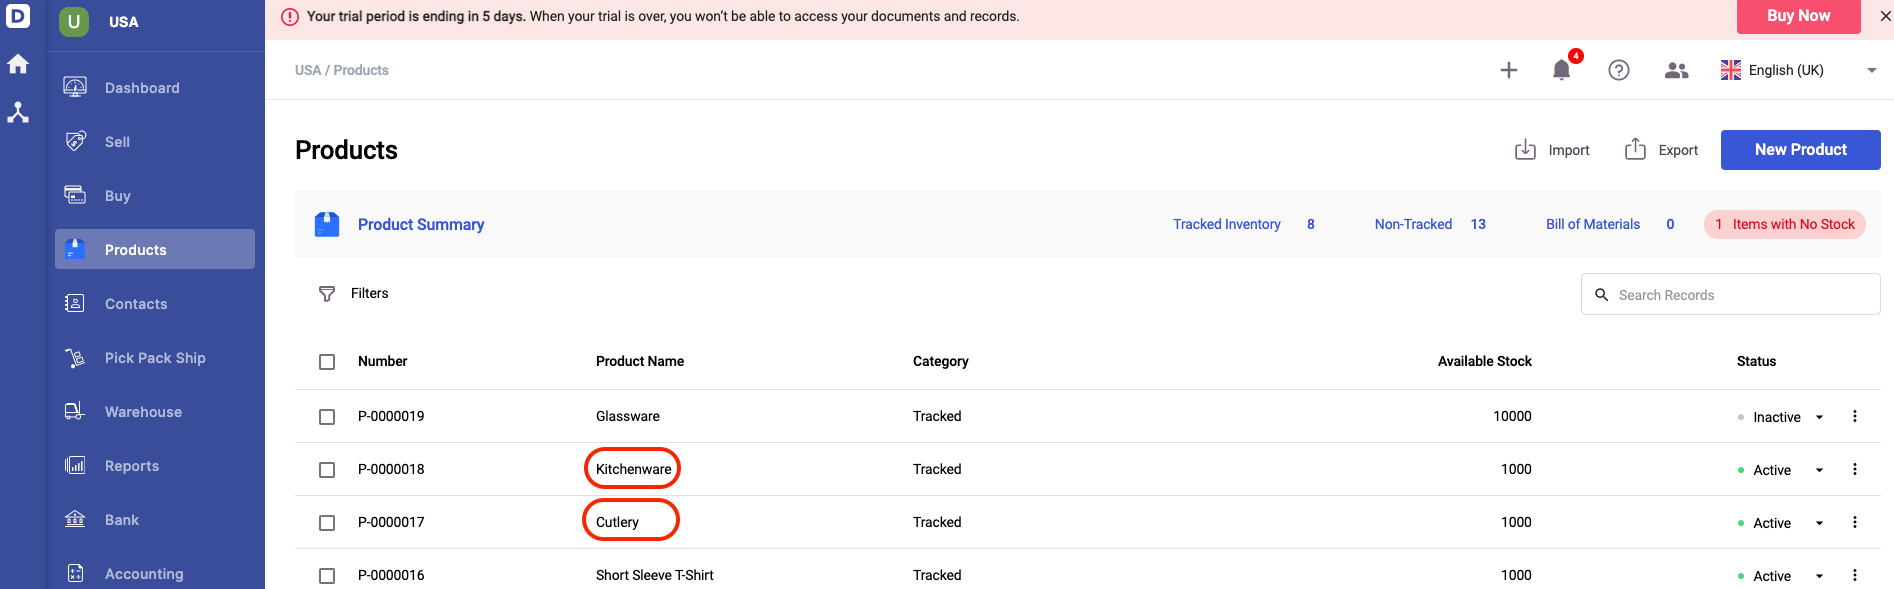
3. You can also view the Products in your Deskera Books account.
Where can I view my orders sync from Shopify to Deskera Books?
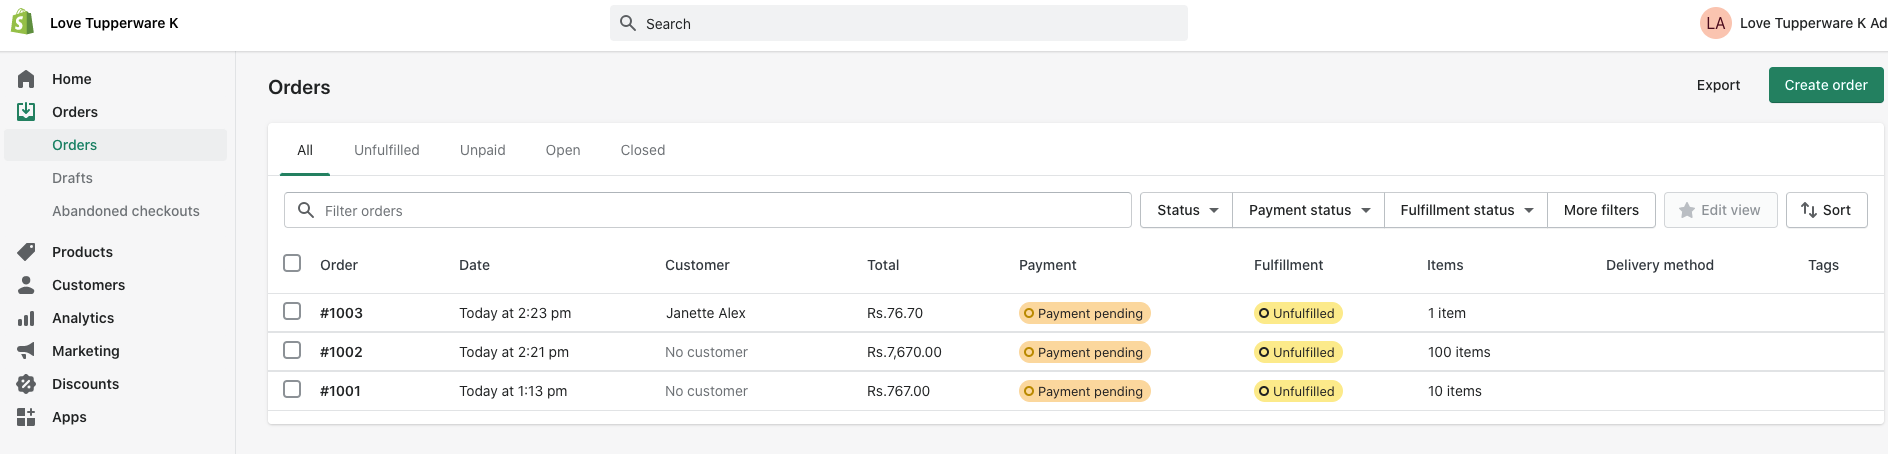
- Any orders mark as pending in your Shopify account will be reflected in Deskera Books.
- Deskera will not sync any orders saved as a draft in your Shopify account.
- Go to the Invoices tab via the sidebar menu.
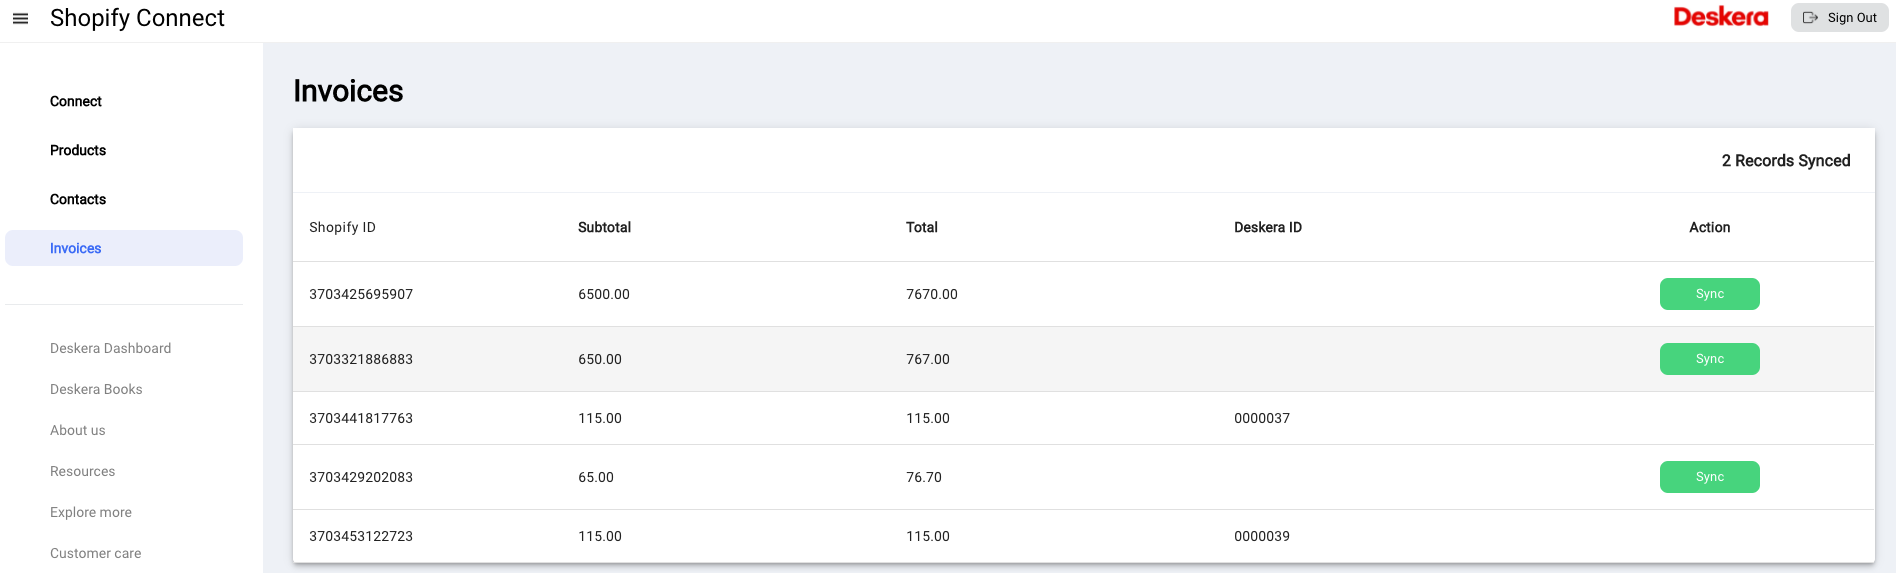
4. Click on the invoices tab via the sidebar menu. Here you can view your orders from your Shopify account.
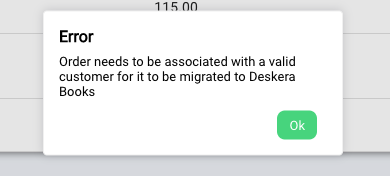
5. If you click on the sync button, you will be prompted with a system message.
6. The message shown can either be your contact's address is invalid or the contact name can't be found in your Shopify account. Go to your order in Shopify and edit the contact's information as per the prompt message.
7. For the orders that have synced to Deskera, go to the Sell tab in Deskera Books and click on the Invoice tab to view it.
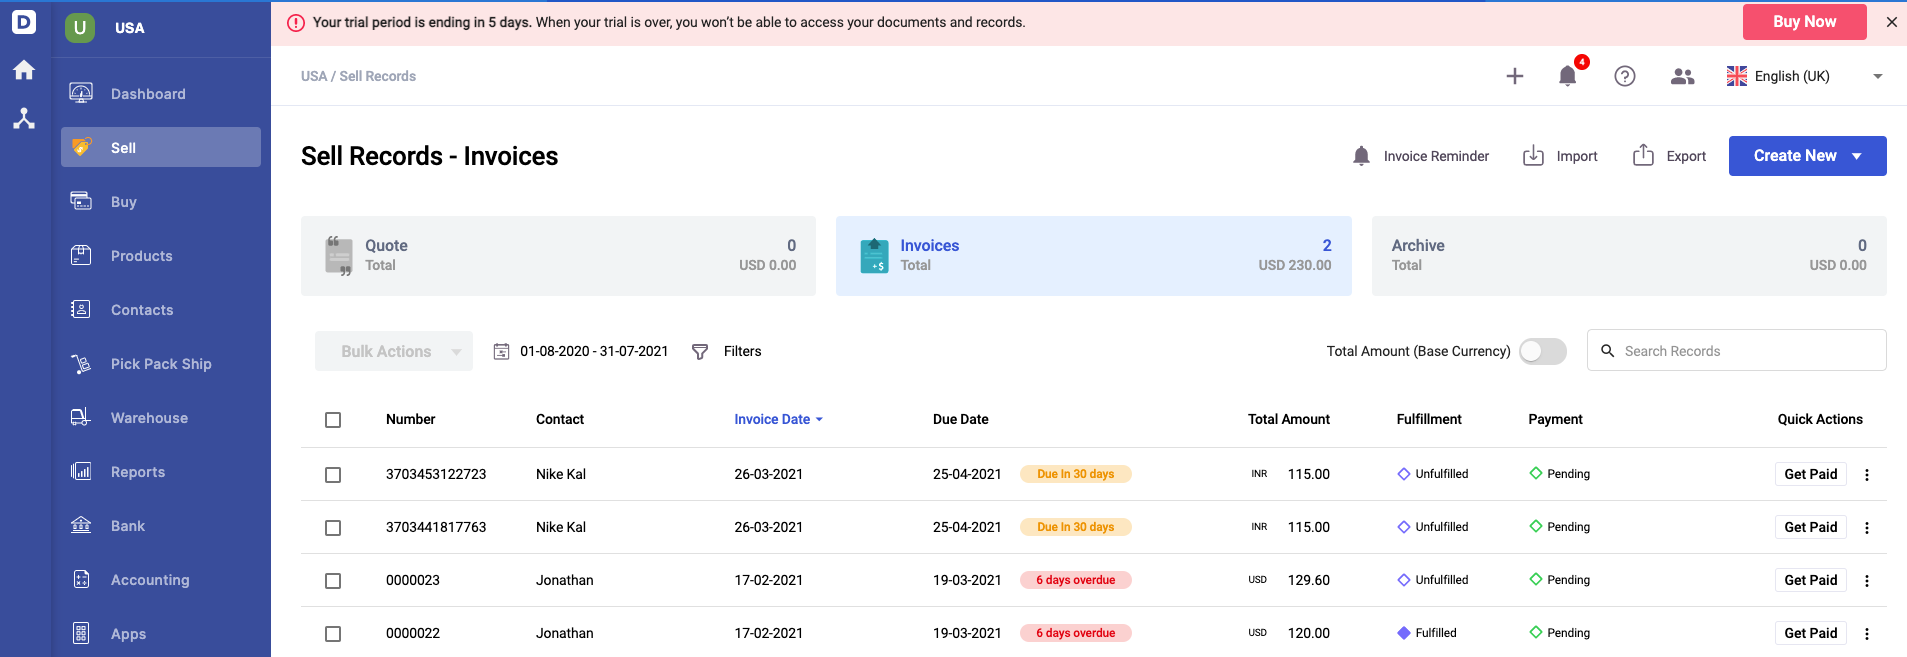
8. You can view your orders from Shopify reflected in the Invoice Summary List.
9. If your orders are already fulfilled and mark as paid in your Shopify store, it will reflect the same in Deskera Books.
How can I configure two-way synchronization in Books?
You can activate two-way synchronization between Shopify to Books and vice versa. Your data will be reflected accurately in real-time on both apps by enabling the two-way sync.
Follow the steps below to configure the two-way sync:
- Once logged in, go to Books and select the App Module on the sidebar menu >> Select eCom App.
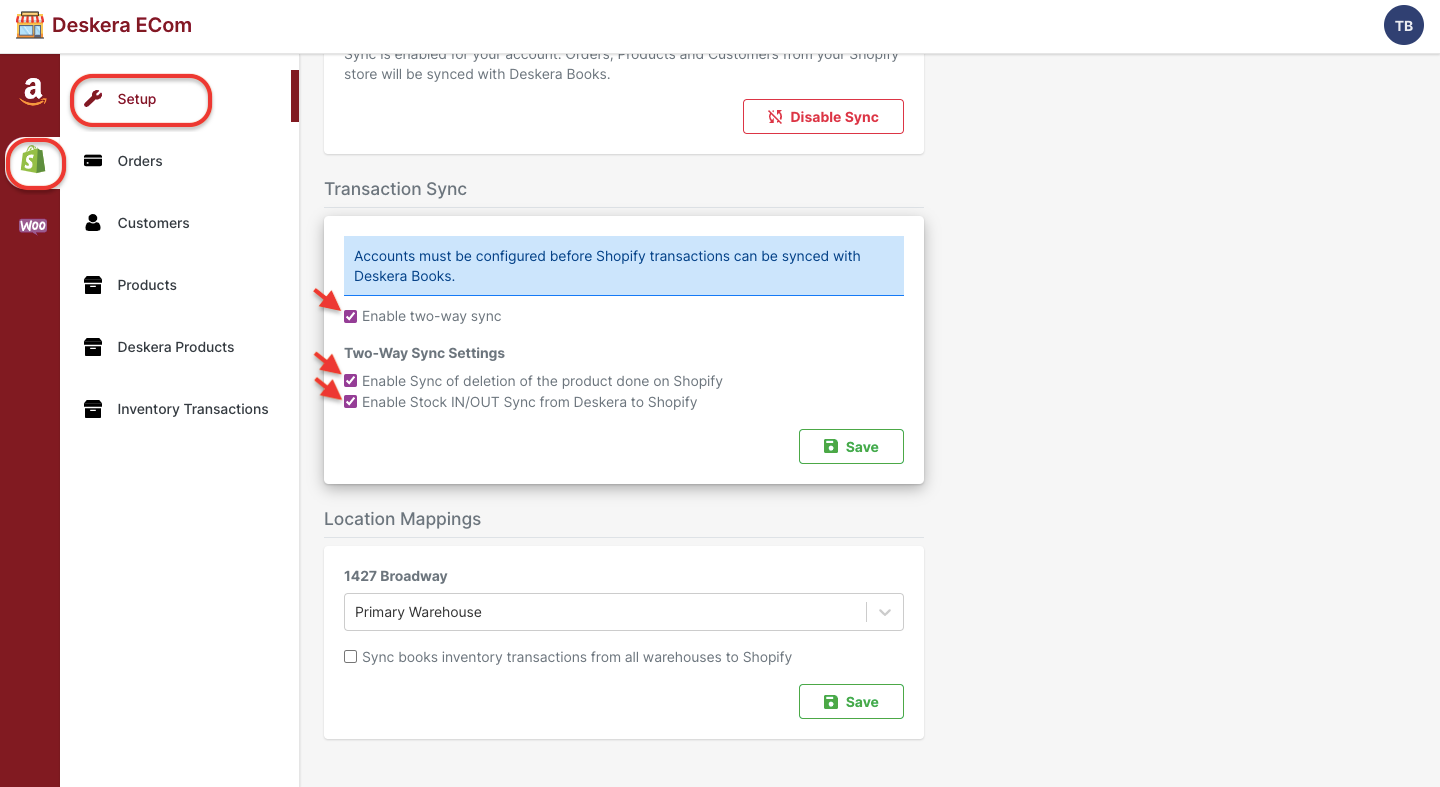
2. Click on the Shopify button >> Go to the Setup Tab.
3. Under the Transaction Sync section, make sure that you tick the checkboxes for 'enable two-way sync,' 'enable sync of deletion of the product done on Shopify,' and 'enable stock in and stock out sync from Deskera to Shopify.'
4. Click Save.
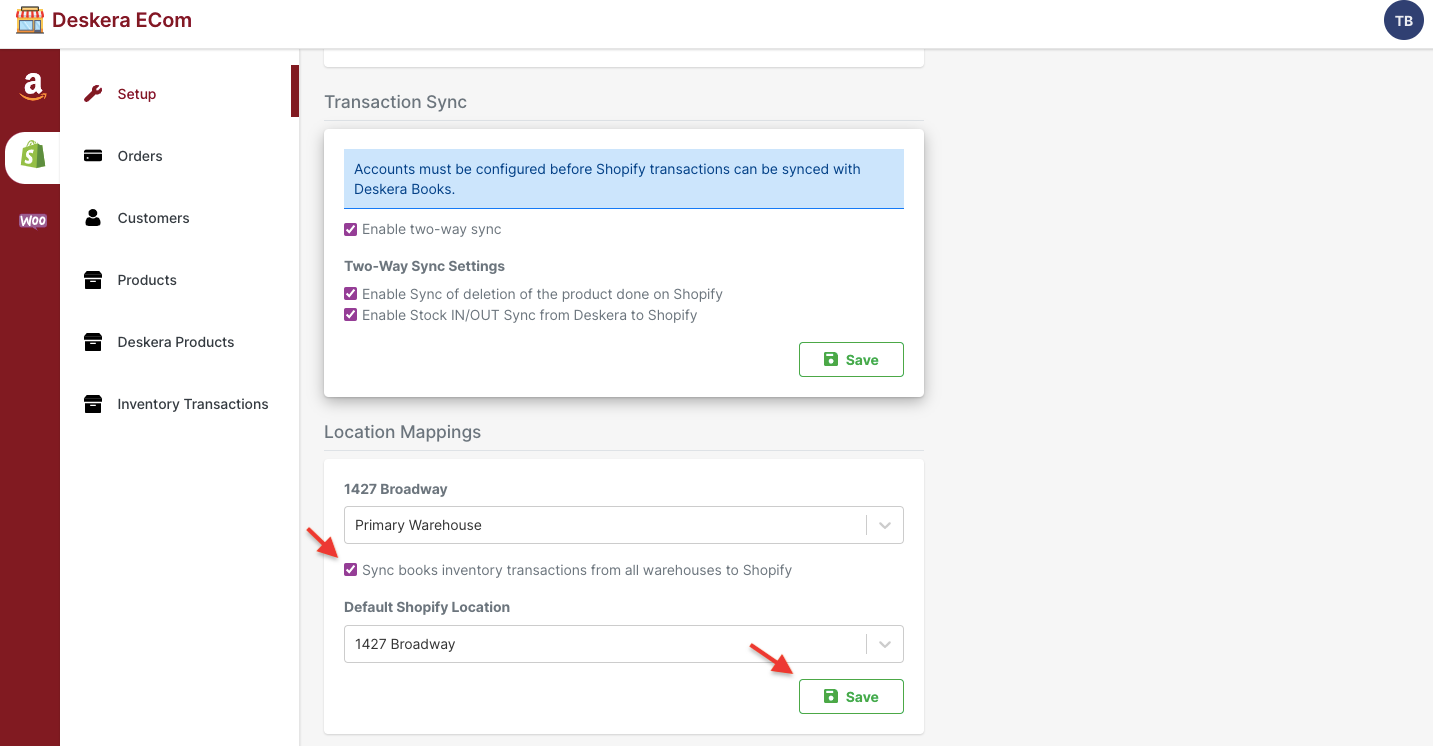
5. Next, enter the location mappings for the warehouse saved in Deskera Books; enable the checkbox "sync books inventory transactions from all warehouses to Shopify" if you have more multiple warehouses in Books.
6. Choose the default Shopify location from the drop-down menu.
7. Click Save.
How does the two-way sync works?
- Navigate to Books and click on the Product Module on the left-hand sidebar menu.
- Click on the New Product button.

3. Enter the product details such as product type, product number, product name, barcode, and product description.
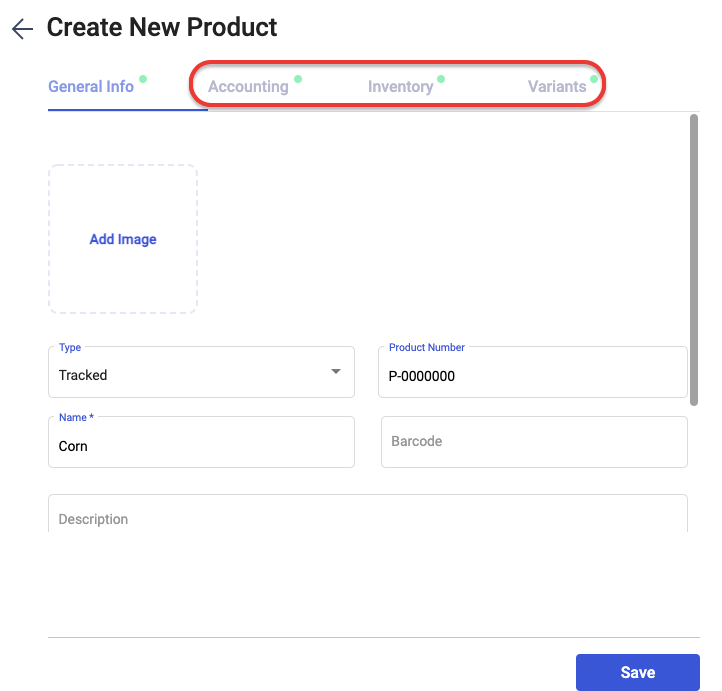
4. Complete the fields under the Accounting, Inventory and Variants Tab as well. Click on the save button.
5. After creating the products successfully, go to Apps >> Select eCom >> Select Shopify app on the sidebar menu.
6. On Shopify page, click on the Deskera Products Module on the left-hand side panel.
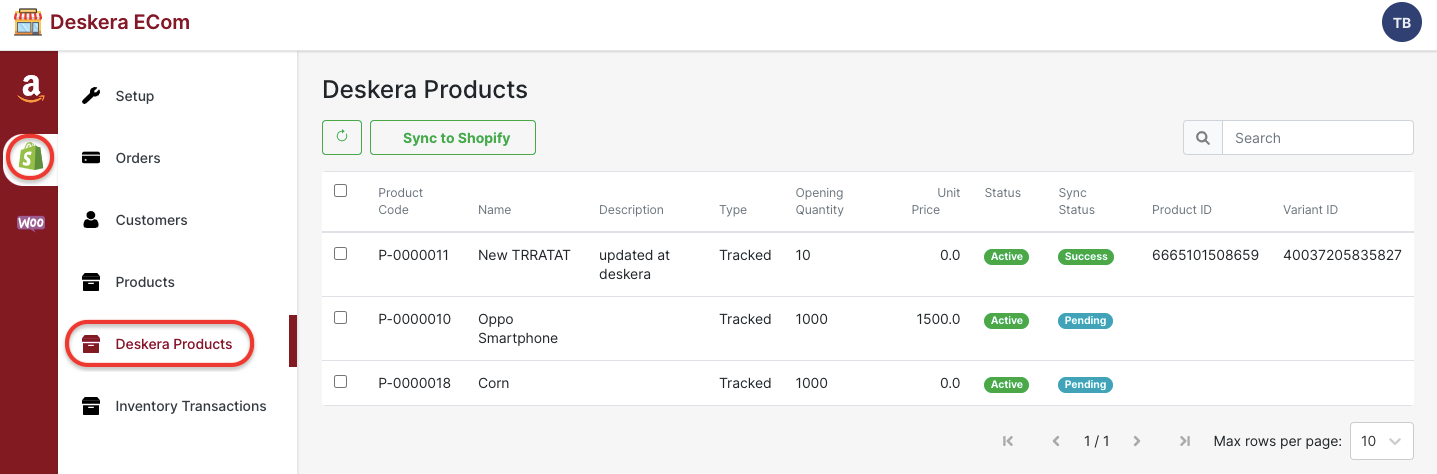
7. All the products in Books Module will appear here as pending status.
8. Click on the sync to Shopify button to update this product in your Shopify store.
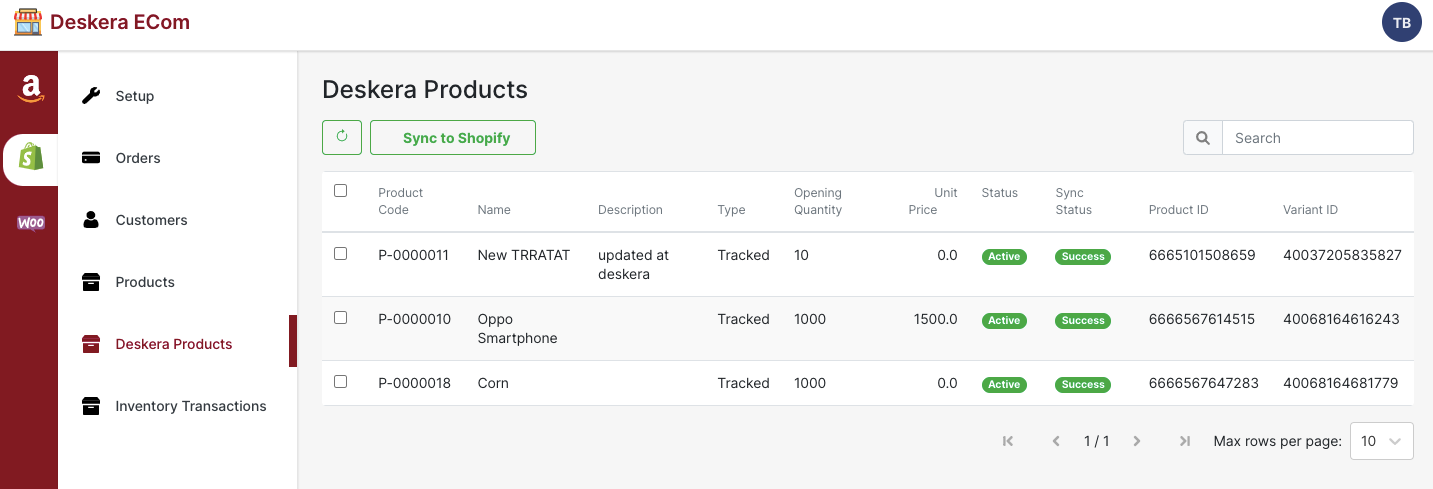
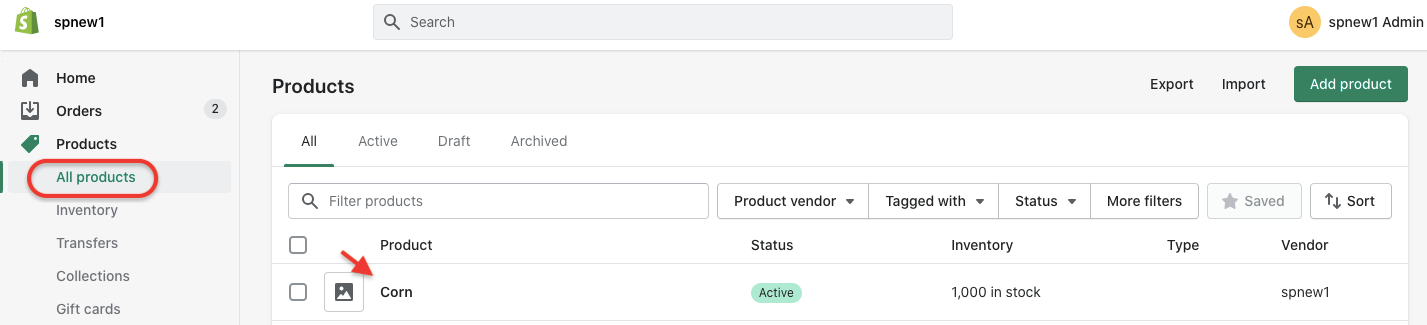
9. After the sync is completed, the sync status column will automatically reflect as success, with its own product ID and variant ID. Go to your Shopify store to cross-check this newly created product.
10. In the scenario whereby you need to adjust the stock movement made in Books to Shopify, go to Apps, select Stock Adjustment Module and adjust the stock accordingly.
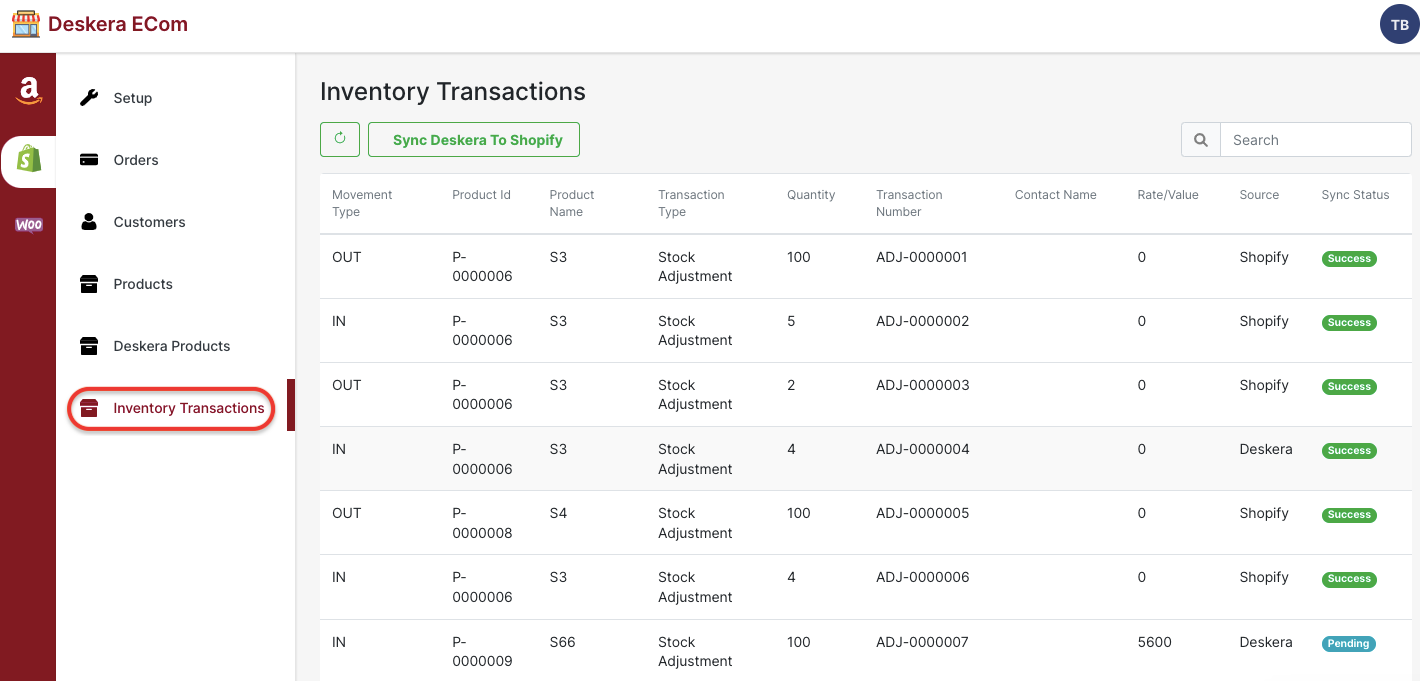
11. All the stock movement in and out of the warehouses records will reflect under the Inventory Transactions in the eCom Shopify page.
12. Click on the Sync Deskera to Shopify button to update the inventory to your Shopify store.