In business, it's crucial to keep track of the landed cost of a product. The landed cost is the sum of costs incurred for bringing a product to the seller's warehouse.
Landed costs typically include freight charges, shipping cost, custom duties, insurance expense, and other miscellaneous cost that seller incur the goods is received by their customers.
Follow the steps below to activate the landed cost in Deskera Books+:
- Login to your Books+ account.
- Select Settings via the sidebar menu.
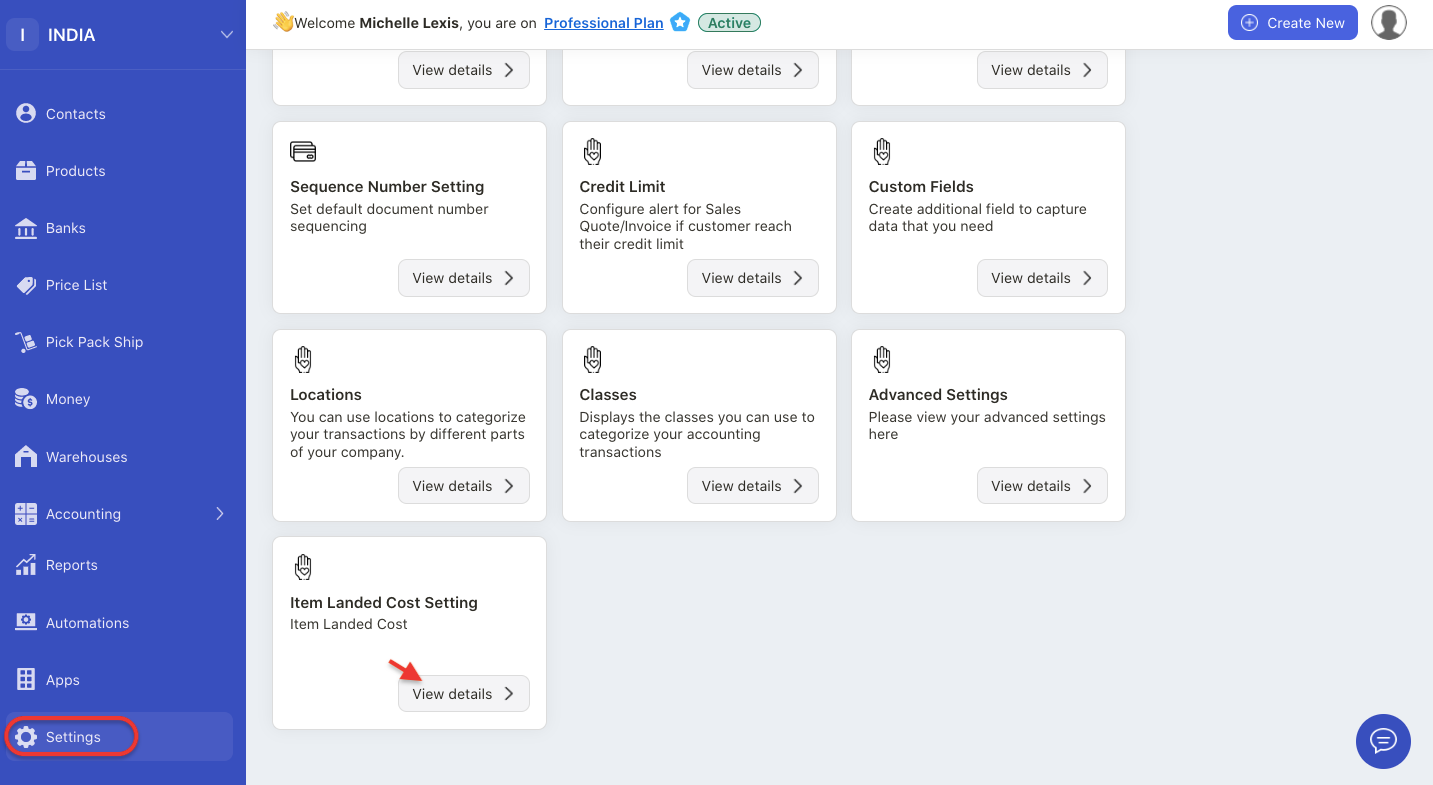
3. Click on the view details button on the item landed cost setting section.
4. Next, enable the landed cost setting feature.
5. Click on the save button.

6. Once you have activated this feature, click on the "+ landed cost category" button.
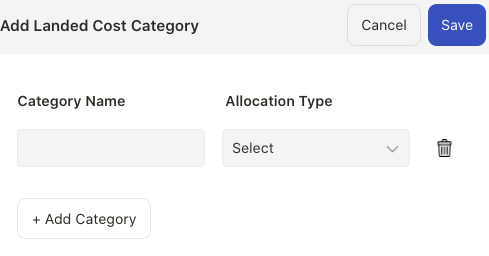
7. A pop-up menu will appear. Click on the Add Category button.

8. Enter the category name and choose the allocation type. Click on the save button.
9. You can view the landed cost added in the Landed Cost Summary List.
How can I activate a product with the landed cost?
- Go to Product Module.
- Click on the create product button.
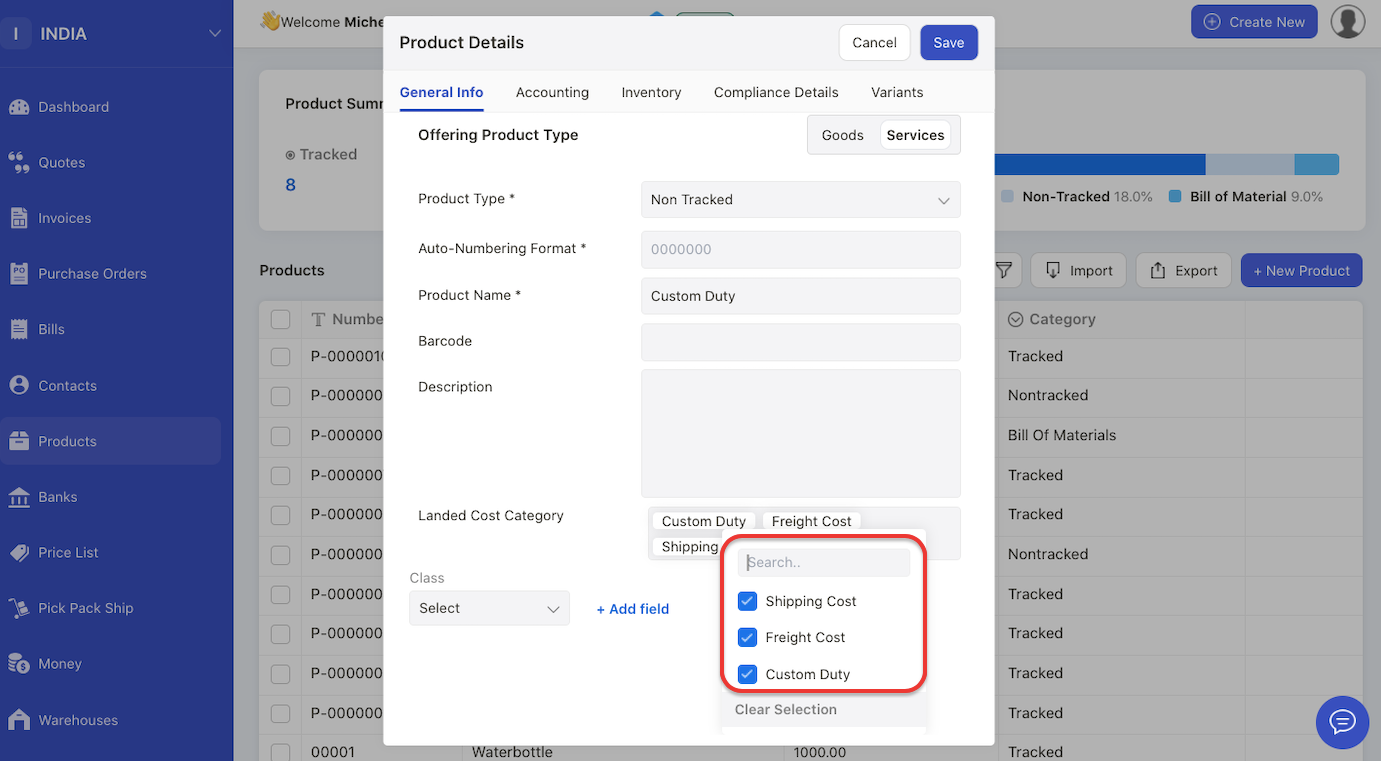
3. On the general info tab, enter the landed cost category for this product. You can add more than one landed cost category.
4. Fill in the other fields for product creation as per this guide.
5. Save the product.
How can I allocate landed cost to a bill?
- Go to Bill document.
- Create a bill with the line items created
- Once the bill is created successfully, mark it as goods received.
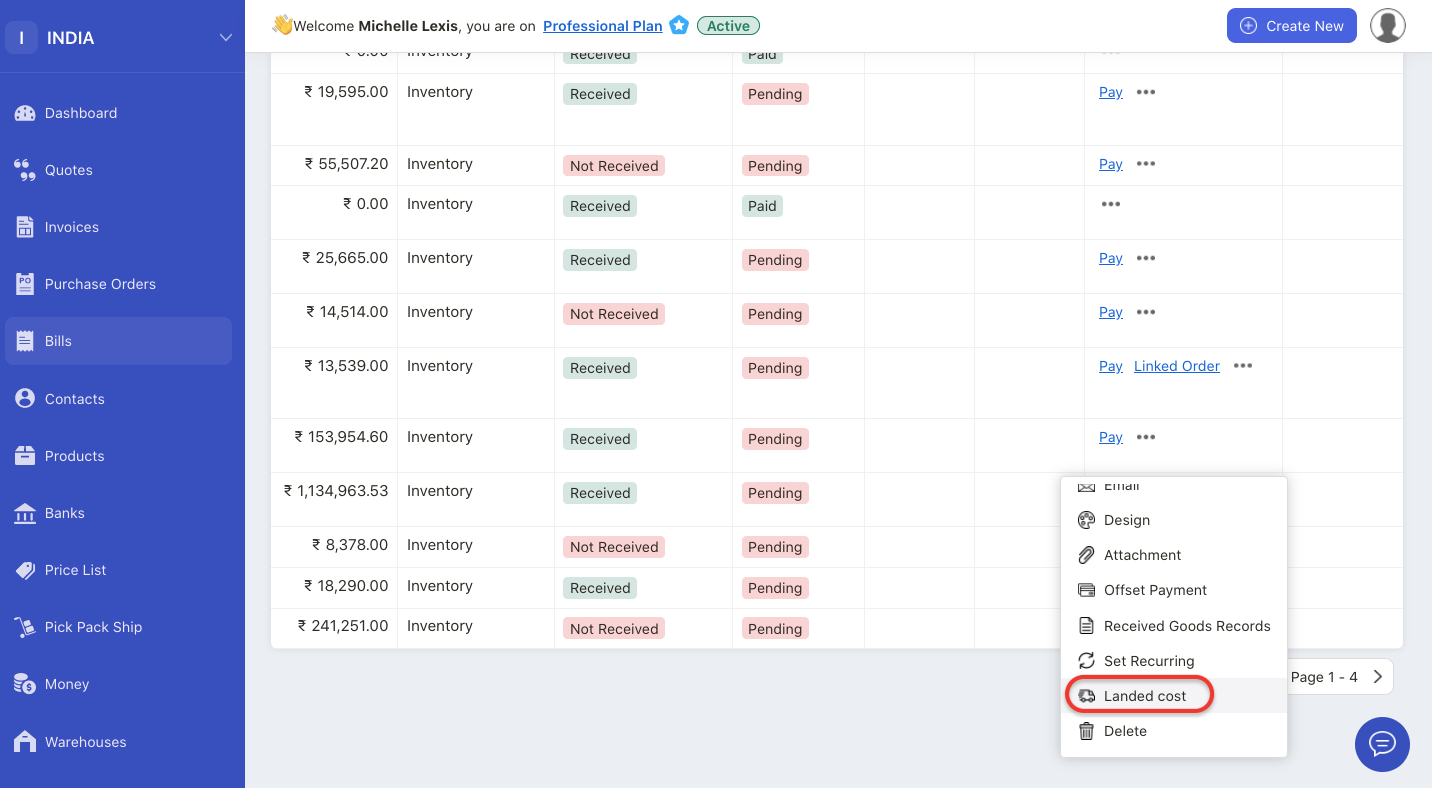
4. Next, click on the three dots under the actions column and select landed cost.
5. A pop-up box will appear.
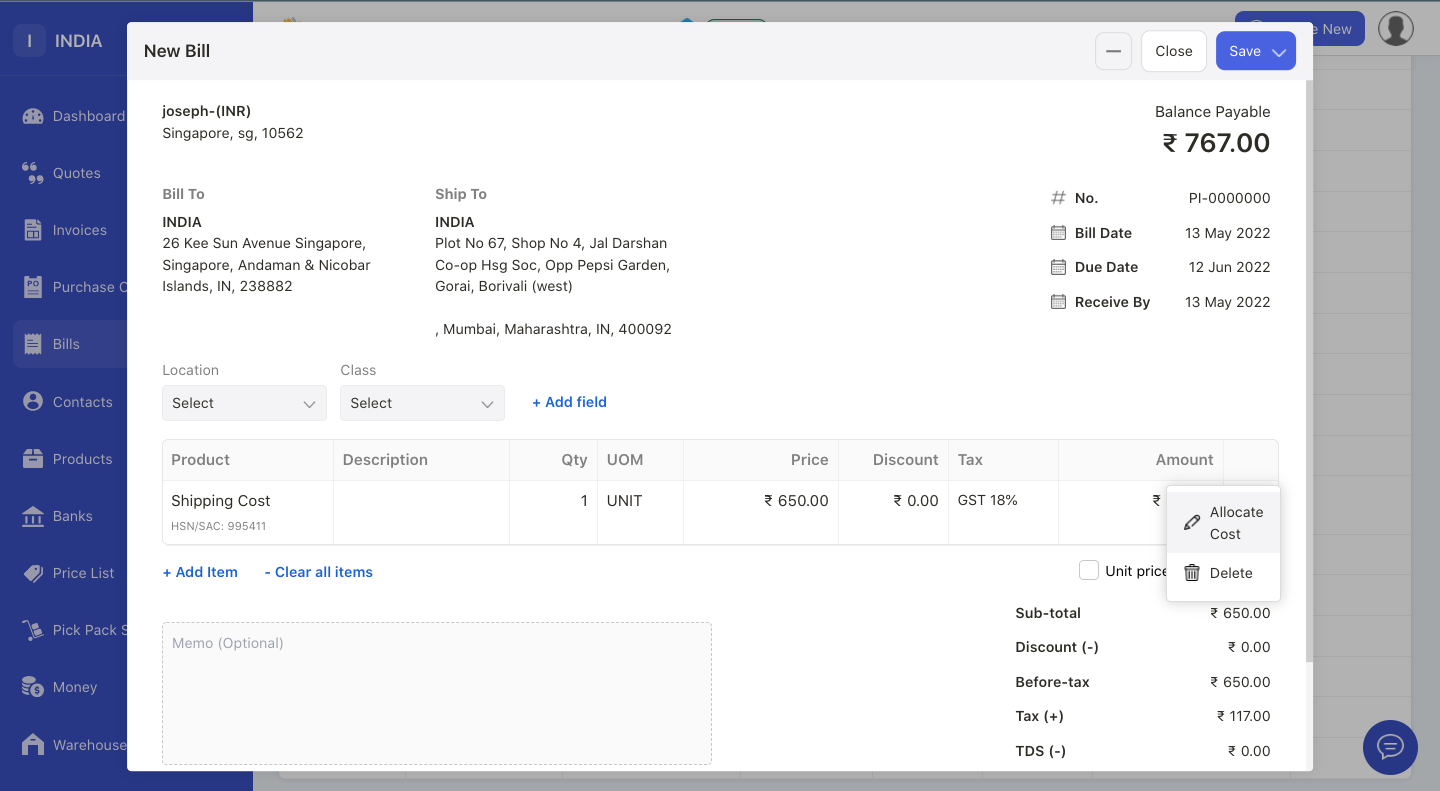
6. Select your vendor name and the line items.
7. Click on the three dots next to the line items. Select allocate cost button.

8. The next pop-up box will appear.
9. Choose the landed cost category.
10. Click save to allocate the landed cost to the bill document.
How can I view the item landed cost report?
- Go to Reports via the sidebar menu.
- Select Item Landed Cost Report under Purchase section.

3. You can view and generate the item landed cost report via this page.

