Create A Tracked Product
Tracked Products are tangible, physical items that have a quantifiable amount and can be tracked, such as clothes, devices, accessories, etc
On Deskera Books+, the feature for products and services management is called Product Master.
To create a Product, access Products Master via the Products tab and click on New Product.
1. Under General info fill in the required fields
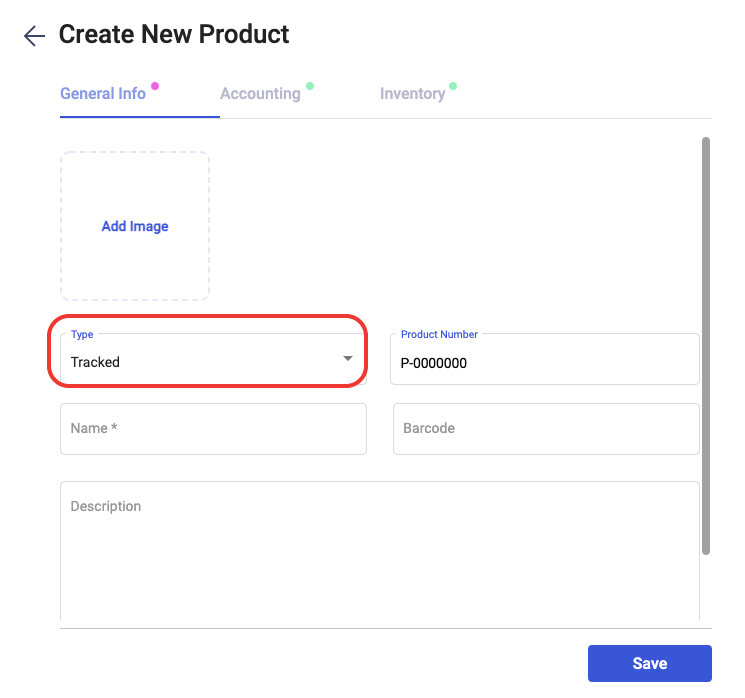
Under General info tab select Type > Tracked.
Fill in the name of the Product. It is optional to fill in the Product Description and Barcode fields. It is Mandatory to upload a product image by clicking on the 'Browse File' option.
2. Under Accounting Tab fill in the required details,
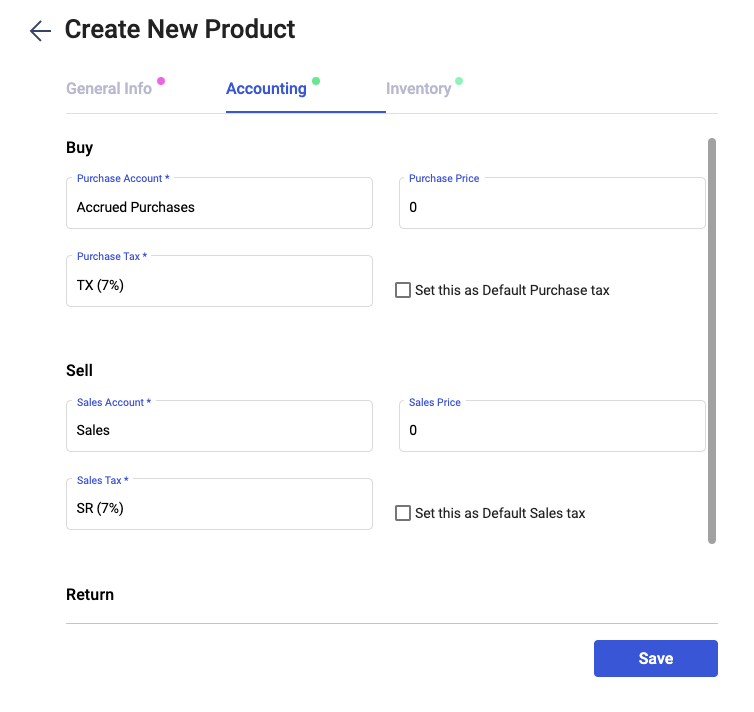
Under the Buy and Sell tab, you may fill in the details of the cost of the Product when you bought it from your supplier and the price of the Product at which it is to be sold to the customer, respectively.
3. Under Inventory tab, fill in the below details,
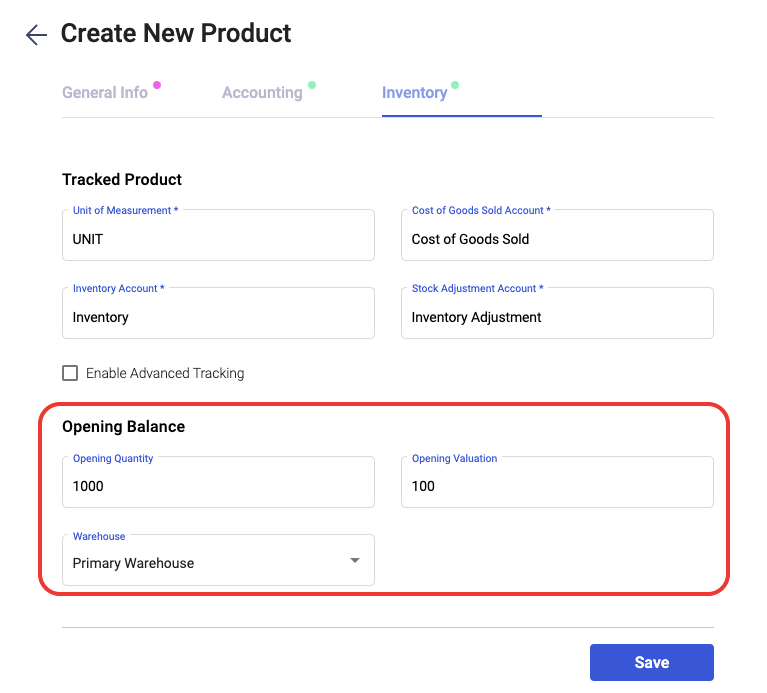
4. Under Inventory Tab for Tracked Product, and opening balance .
5. Under Opening Balance section you need to indicate the Opening Quantity (starting amount of your product stock) and the Opening Valuation (the total cost of opening quantity at the time of purchase).
6. Under warehouse filed , you can select the warehouse name to know the status of the product location.
7. Click on save button which will create a new product in the system.
8. On the right side of the screen click on the custom field tab where you can add new custom fields for creating your Tracked Product.
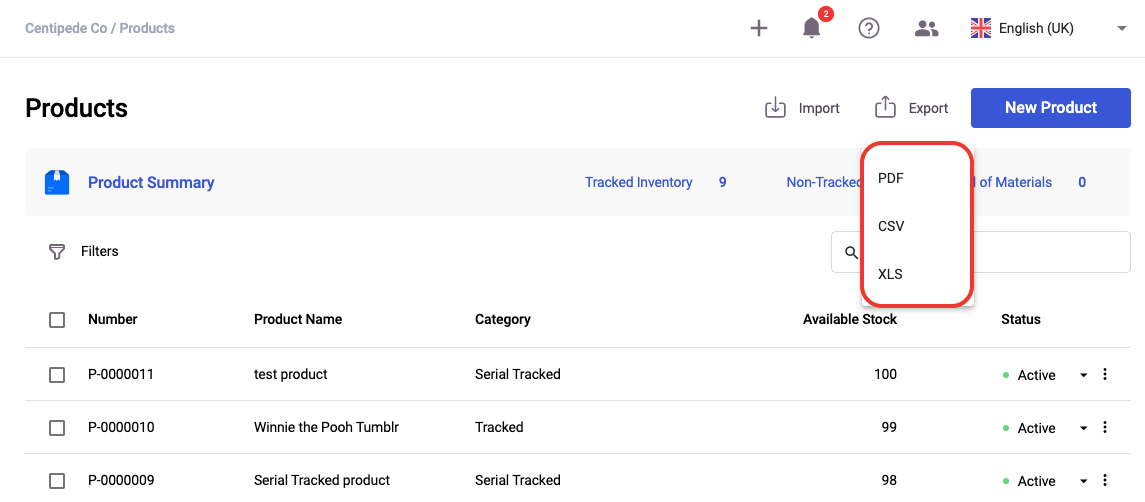
Once you have saved the product, go to the Product Summary List and click on the export product icon.
Here you can download the lists of products you have in the system to your desktop.
You can choose to save the file as PDF, XLSX, and CSV files.
Besides that, you can also choose to filter the products based on the product's type or the status of the product.
You also have an option to Bulk Import the Product in the system by clicking in the Import icon.
Create A Non-Tracked Product
Non-Tracked Products are intangible items such as alteration, cleaning or set-up services, etc. which involve an individual or a team providing a paid service to their customers.
These are typically created as non-tracked as it is not quantifiable and there is no inventory to be managed.
To create a Non-Tracked Product, access Product Master via the Product tab, and click New Product
1. Under General info fill in the required fields
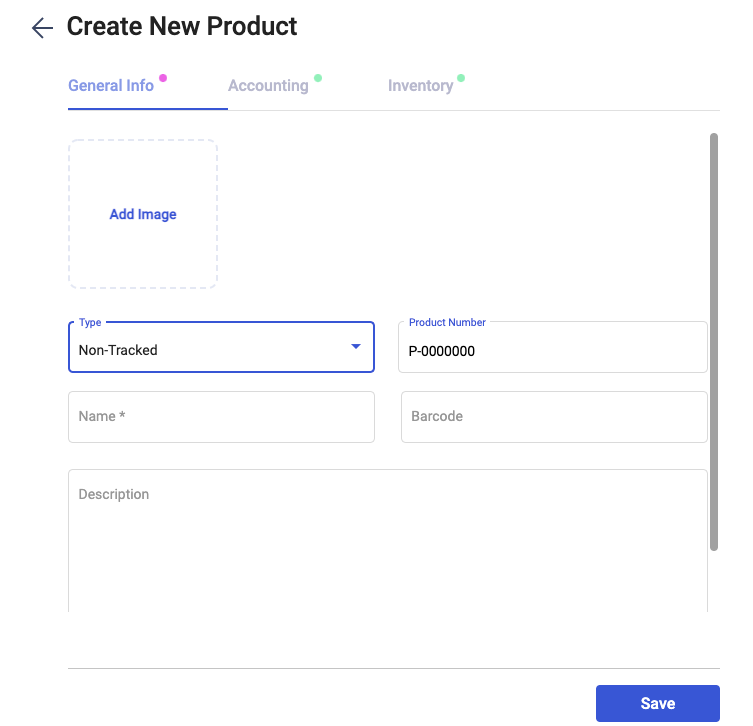
Under General info tab, Select the product type as Non-Tracked.
Fill in the name of the Non-Tracked Product. It is optional to fill in the Product Description and Barcode fields. It is Mandatory to upload a product image by clicking on the 'Browse File' option.
2. Under Accounting Tab fill in the required details,
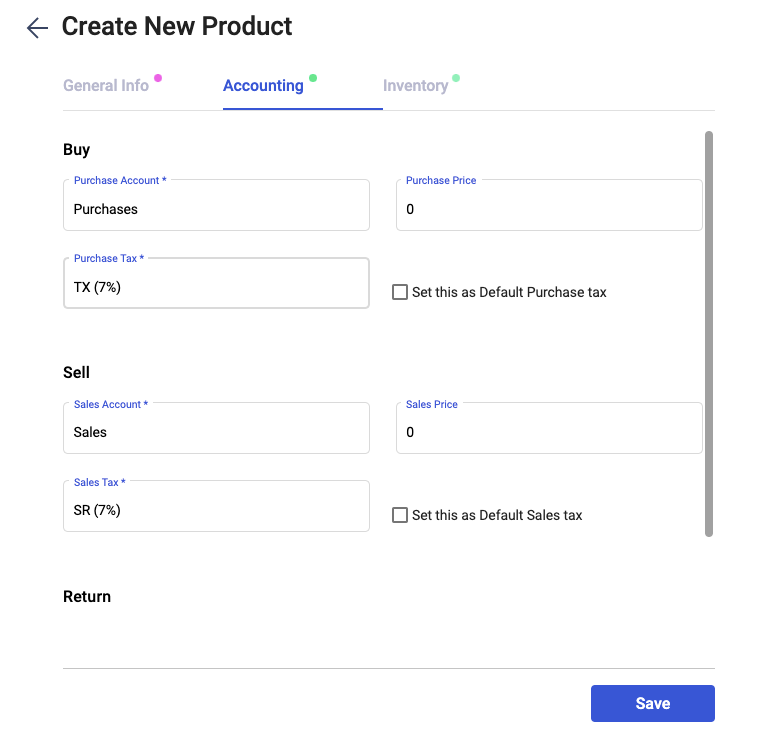
Under the Buy and Sell tab, you may fill in the details of the cost of the Product when you bought it from your supplier and the price of the Product at which it is to be sold to the customer, respectively.
3. Under Inventory tab, fill in the below details,
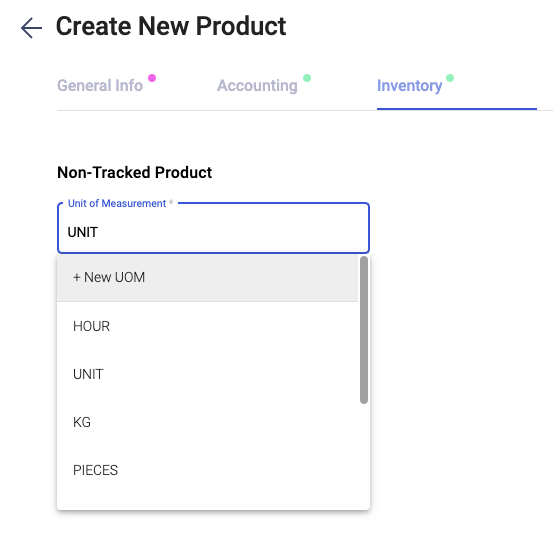
- Under Inventory details tab, Indicate the unit of measurement.
- Click on save button which will create a new product in the system.
- On the right side of the screen click on the custom filed tab where you can add new custom fields for creating your Non-Tracked Product.
Create Bill Of Materials
Based on your reading on the Bill of Materials, you now have a clear understanding of the meaning of the Bill of Materials.
Here on Deskera Books, we allow our users to create the Bill of Materials (B.O.M) as well.
We do understand that this is a crucial feature especially for those in the manufacturing industry.
To create your first Bill of Materials on Deskera Books, follow the steps as mentioned below:
1. Click on the Product on the sidebar menu and select the "New Product" button.
2. You can view three different tabs on this page if you select the type of product at the Bill of Materials.
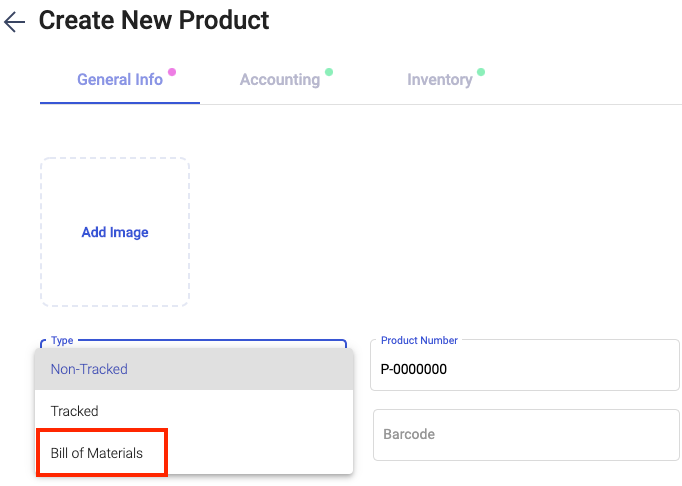
3. Fill in the information in the first tab, General Info:
- Upload the image of the B.O.M
- Select the type of product as Bill of Materials
- Indicate the Product number of the B.O.M
- The name of the material
- Barcode
- Description of the material
4. Next, fill in the information of the B.O.M under the Inventory section:
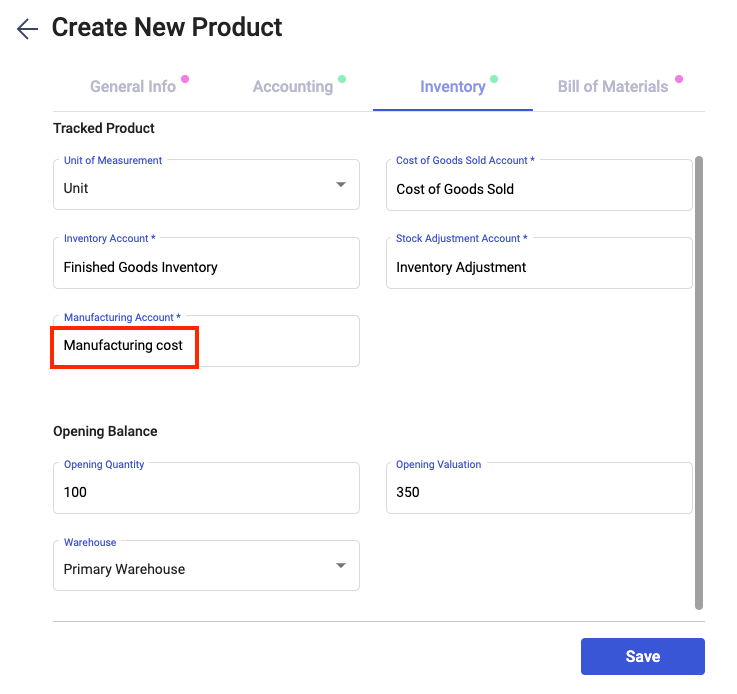
- Unit of measurement
- Cost of goods sold account
- Inventory account
- Stock adjustment account
- Manufacturing account
- Opening quantity and valuation
- Warehouse
5. In the Bill of Materials tab, enter the component product and additional cost associated with the Bill of Materials.
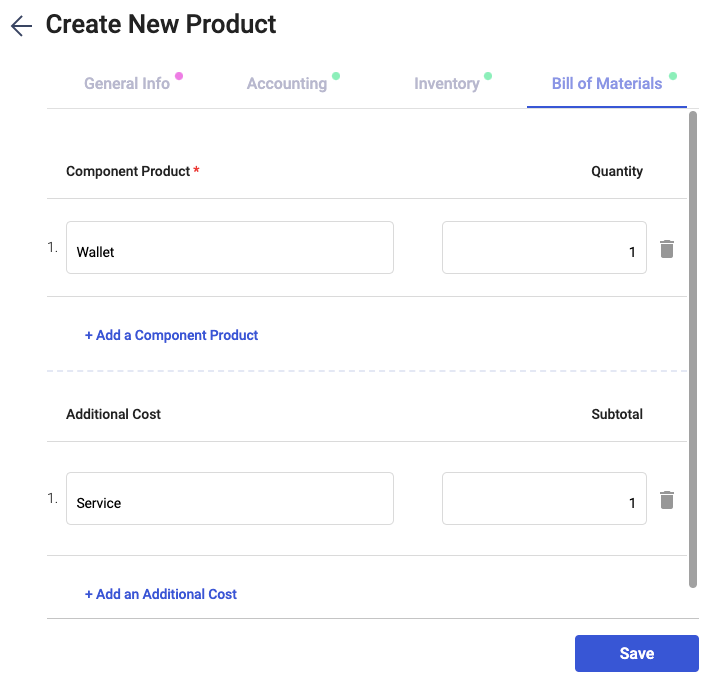
6. Once done, click on the Save button. You should be able to view the Bill of Materials in the Product Summary.
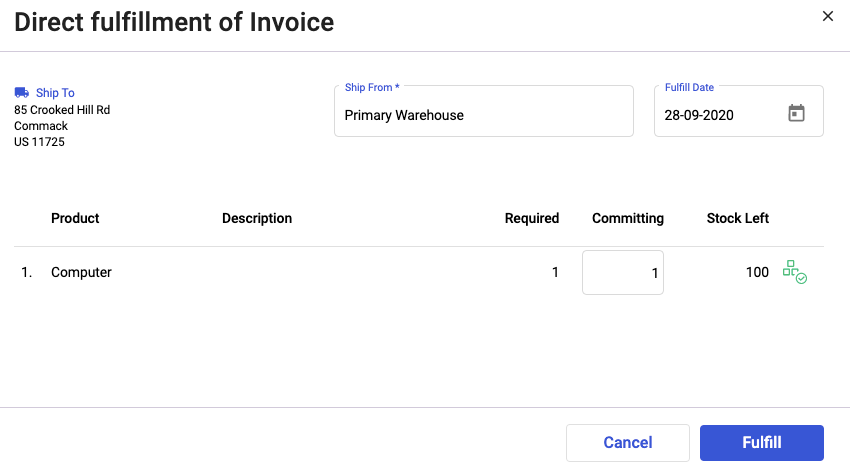
While fulfilling the invoice you can see the stocks available under BOM for that particular product.
Congratulations! You have successfully created a Tracked Product/ Non-Tracked Product and Bill Of Material.

