Now, Deskera Mobile E-leave has the functionality that enables our users to apply their leaves by just clicking a few steps. Users can also apply different types of leaves, such as annual leave, medical leave, emergency leave, or other kinds of leaves that are applicable to their organizations.
Using the Deskera Mobile e-leave system, users can apply their leave based on the steps mentioned below:
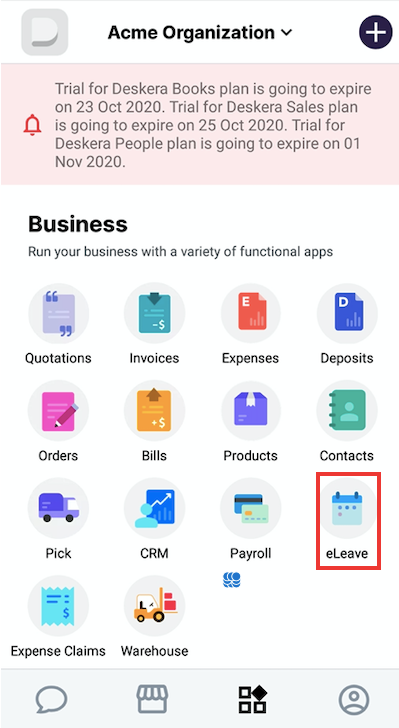
1. On the Deskera Mobile dashboard, tap on the eLeave icon under the Business Module section, and you will be able to add new leave.
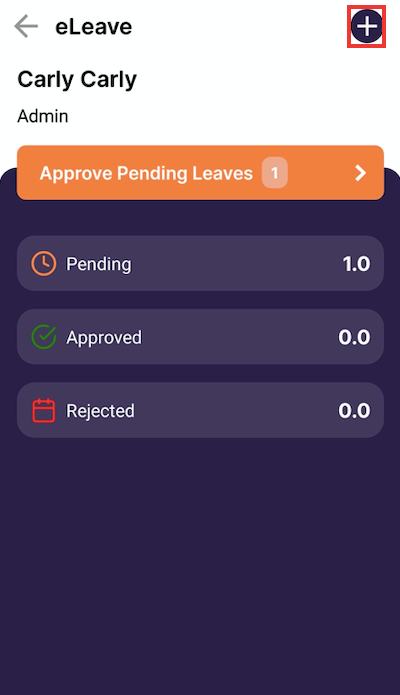
2. By clicking on the ‘Add +’ icon located on the right side corner of the screen a screen will appear where you need to fill in the following fields.
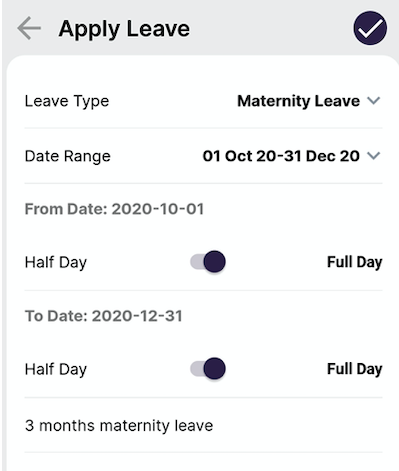
- Select the Leave type created which is applicable from the Dropdown list.
- Select the Leave dates you want to take from the Date Range calendar
- Under Reason Section, mention the leave taken reason
3. Once all these details have been filled in, click on the tick icon for the leave to get reflected in the system.
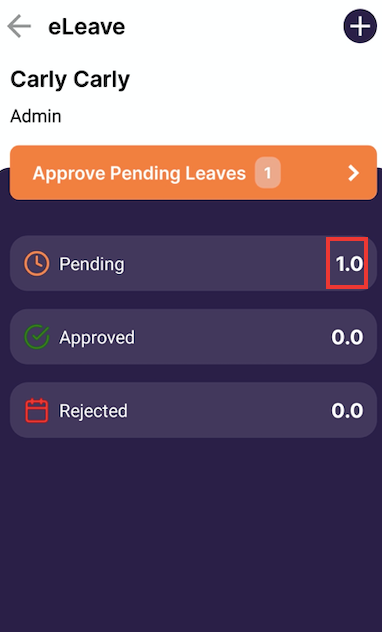
4. Under Pending Section you can view all your applied leaves.
Approve and Reject Leaves
As an Admin you have an authority to approve and reject leaves of your team member following the below steps.
1. On the main e-leave dashboard click on the Approve Pending Leaves tab, where you can view the leaves applied by your team member, and also from here you can decide whether to approve or reject the leaves.
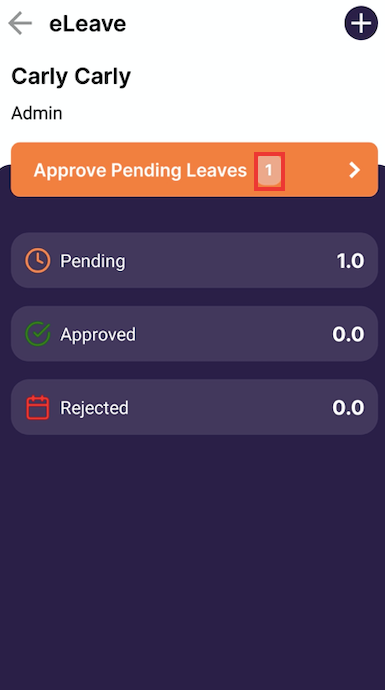
2. Click on the pending leave tab, where a window will pop up, and you can find the option to either to Reject or Approve the leaves.
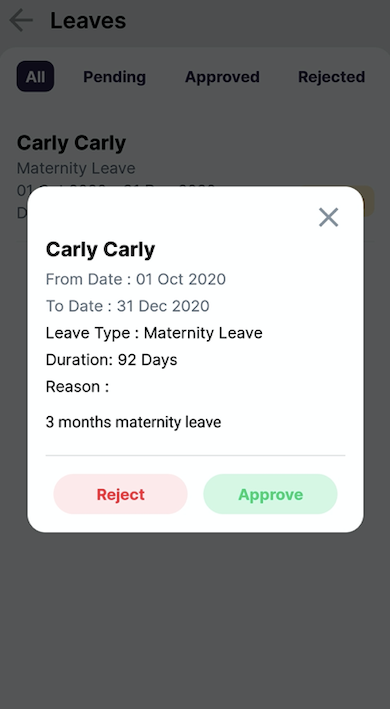
3. Whatever option you choose to reject or approve the leaves the changed status will be reflected and it will be moved under the Reject and Approve tabs accordingly.
Please note you first need to create the e-leave type on the Deskera web which will be then synced with the Deskera Mobile app.
Congratulations! You have successfully learned how to apply e-Leaves using Deskera Mobile App.

