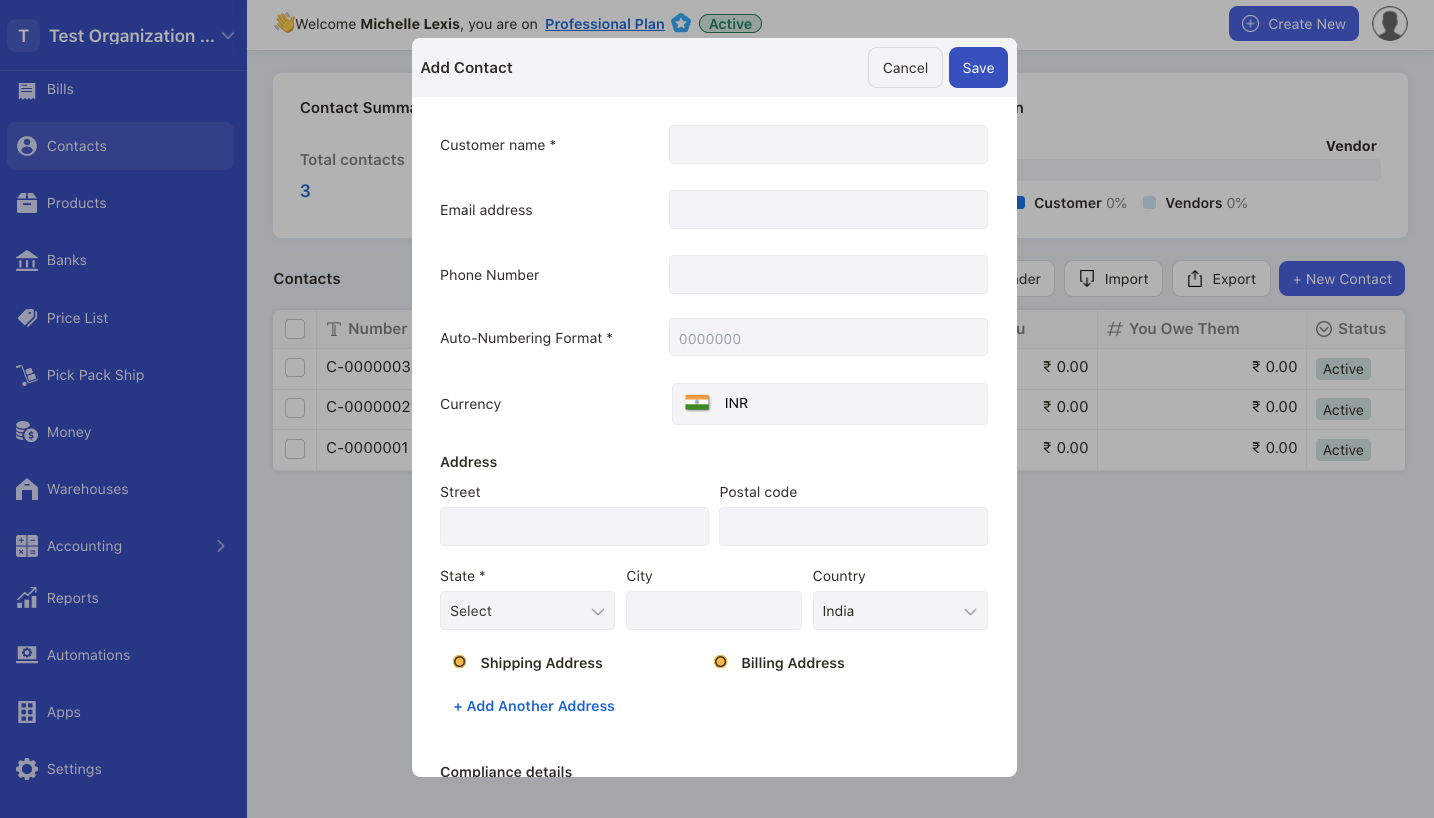
India: How to set up my contact profile using Deskera Books Plus?

Setting up correct information is crucial in the contact module.
Your contact information will be pre-filled during documents creation in Books+.
Plus, the system also will compute the IGST, CGST and SGST based on your contact data.
To set up your contact profile, follow the steps below:
- Login to your Books+ account.
- Go to Contact Module via the sidebar menu.
- Click on the Add New Contact button.
- Fill in the fields in the contact pop-up menu;

- contact name; enter your customer or vendor name
- email address; enter the contact's email address
- phone number; enter the contact's phone number
- auto-numbering format; enter the contact sequence number
- currency; enter the currency use to transact with this contact
- address; enter the contact billing and shipping address. Please fill in complete address as this will determiner the GST computation in the system
- compliance details-GST treatment; enter the contact's GST treatment. Choose from the drop-down menu
- GSTIN number; enter your contact GSTIN number, if they are GST-registered
- customer type; enter whether the customer is based on SEZ (export without payment of duty, WOPAY) or SEZ (export with payment of duty, WPAY). If your customer is not from SEZ, enter NA
- vendor type; enter whether the customer is based on SEZ (export without payment of duty, WOPAY) or SEZ (export with payment of duty, WPAY). If your vendor is not from SEZ, enter NA
- PAN/TAN number; enter your contact PAN/TAN number
- payable account; enter the payable account tag against this contact
- receivable account; enter the receivable account tag against this contact
- credit limit; configure the credit limit for this contact. You can refer to this guide for more information.
- purchase price list; tag the purchase price list against your vendor
- sales price list; tag the sales price list against your customer
- resident or non-resident; tick the checkbox whether your contact is a resident in India or non-resident
- TDS applicable; tick the checkbox if TDS is applicable for this contact. Then, enter the vendor TAN number, deductee type, tick the checkboxes whether exemption limit is considered or non-deduction or lower deduction is applicable. If non-deduction is applicable, enter the contact certification number, TDS rate, certificate date and deduction reason
5. Click on the save button after completing the contact profile setup.
6. Please make sure that the contact details are accurate. Updated contact information will only be reflected in new documents.